Part 1 - Installing VMware
Preface on Installing VMware: When learning Linux, server operations, network experiments, container technologies, and various development environment deployments, virtual machines are almost one of the most common and practical basic tools.
Installing VMware
Preface
When learning Linux, server operations, network experiments, container technologies, and various development environment deployments, virtual machines are almost one of the most common and practical basic tools. Compared to operating directly on the local machine or physical devices, virtual machines can provide a more independent, secure, and repeatable experimental environment, which is convenient for testing and more suitable for daily learning and tinkering.
As one of the common virtualization tools, VMware is used by many beginners and technicians to build local lab environments due to its good stability, relatively moderate learning curve, and complete functionality. Through it, we can run multiple operating systems simultaneously on one computer, used to install Ubuntu, CentOS, Windows Server, or conduct exercises related to networks, services, scripts, and environment configurations.
This article will focus on the installation process of VMware virtual machines, trying to guide you through the entire process from software preparation to completion in a clear, direct, and practical way. For friends who are just starting to contact virtualization, this will be an important first step for subsequent learning of Linux system installation, environment setup, and technical experiments.
Detailed Steps (with Screenshots)
Downloading VMware
Official Website URL
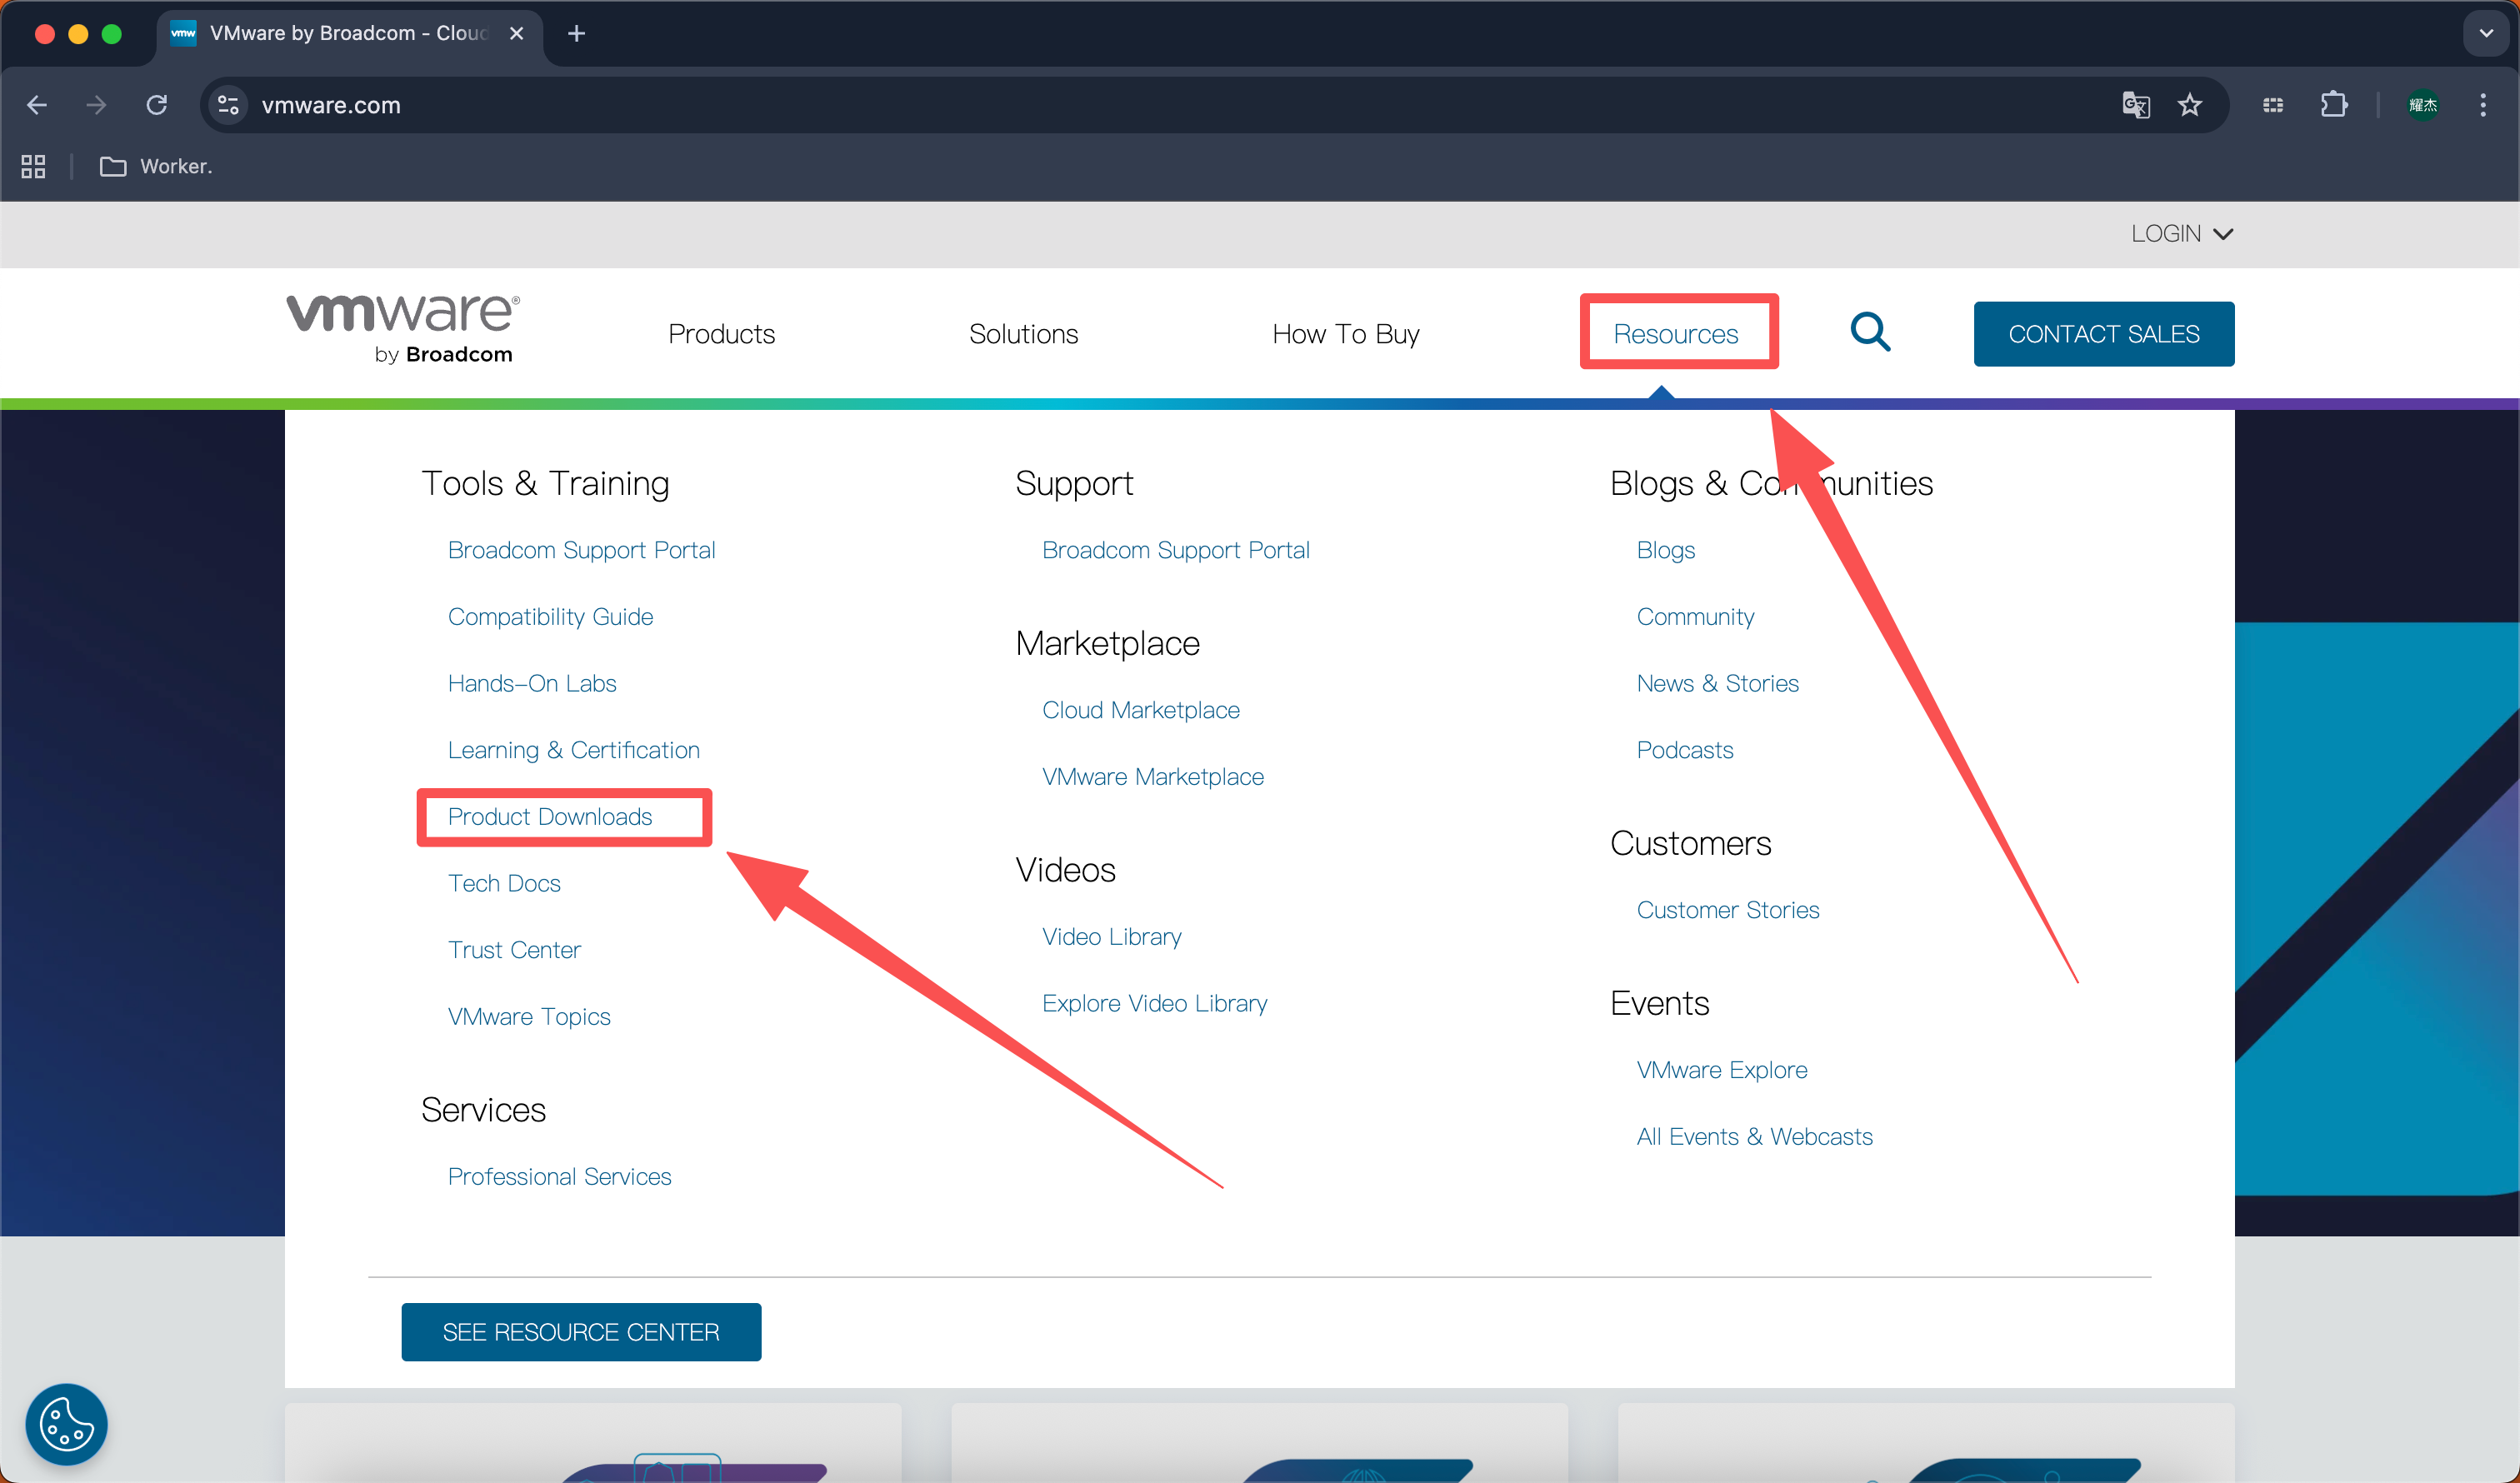
https://www.vmware.comOpen the official website and enter the following page, click “Resources” -> Click “Product Downloads”
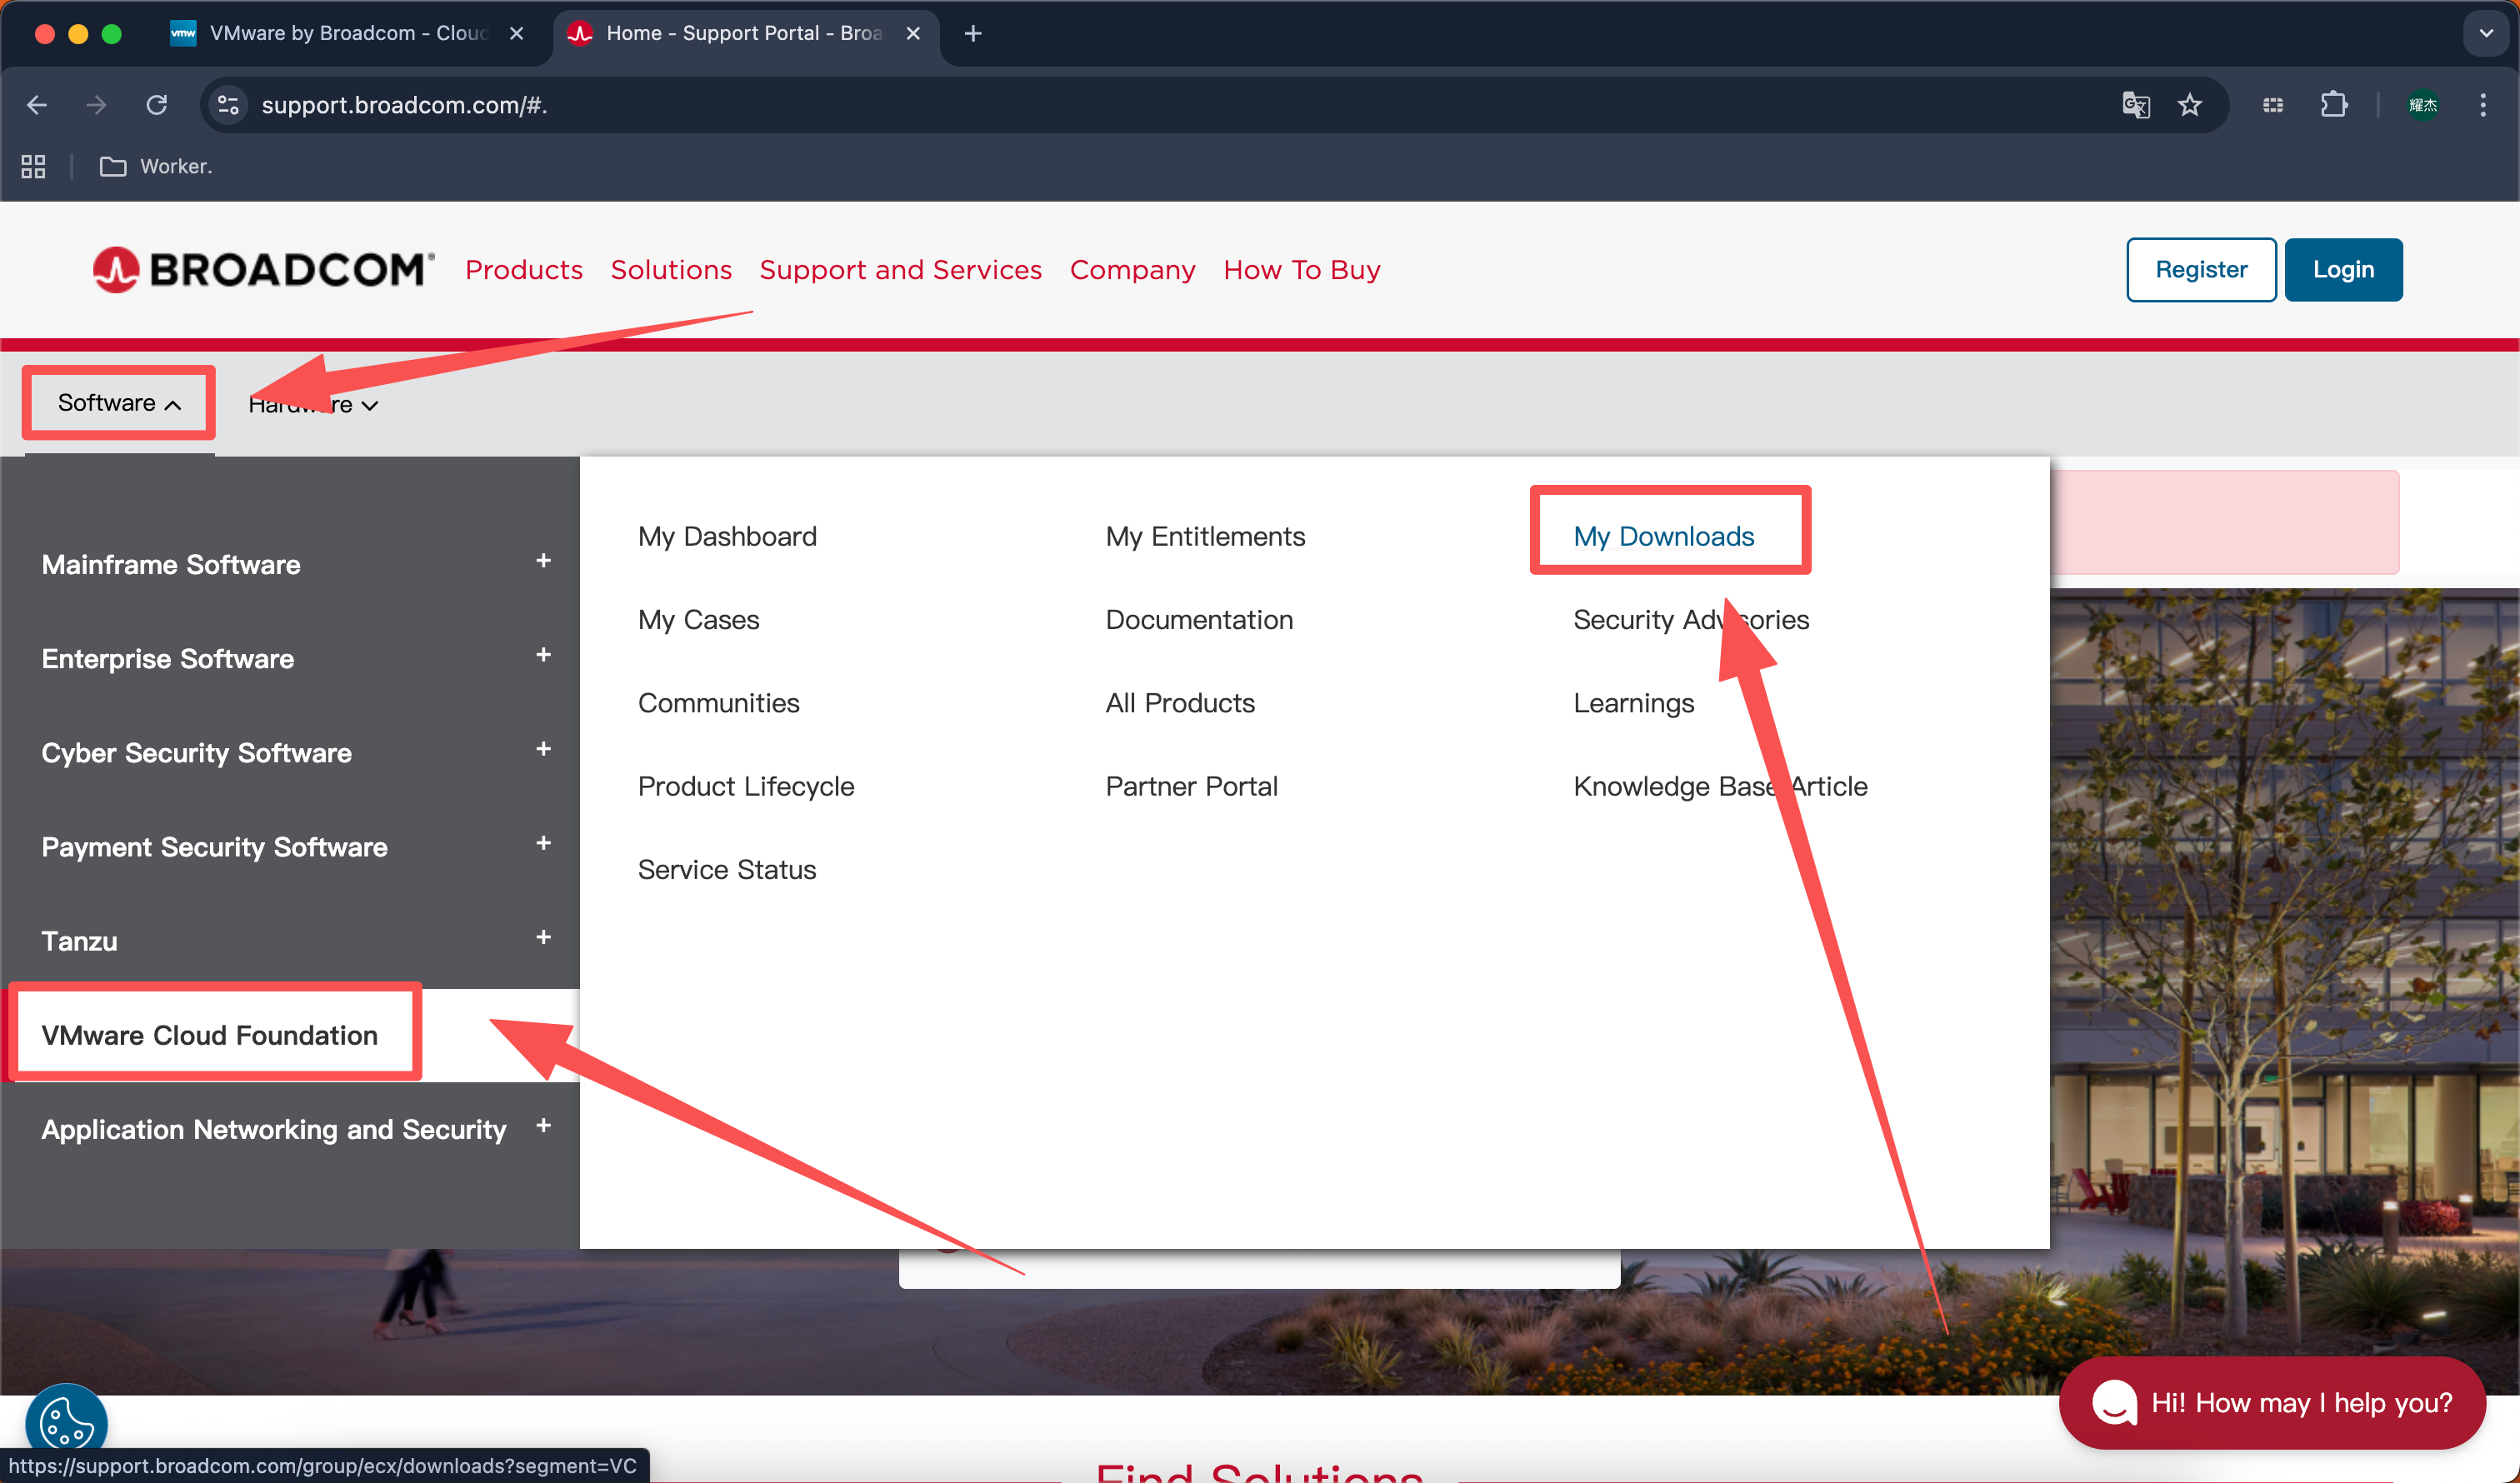
Select “Software” -> Select “VMware Cloud Foundation” -> Select “My Downloads”
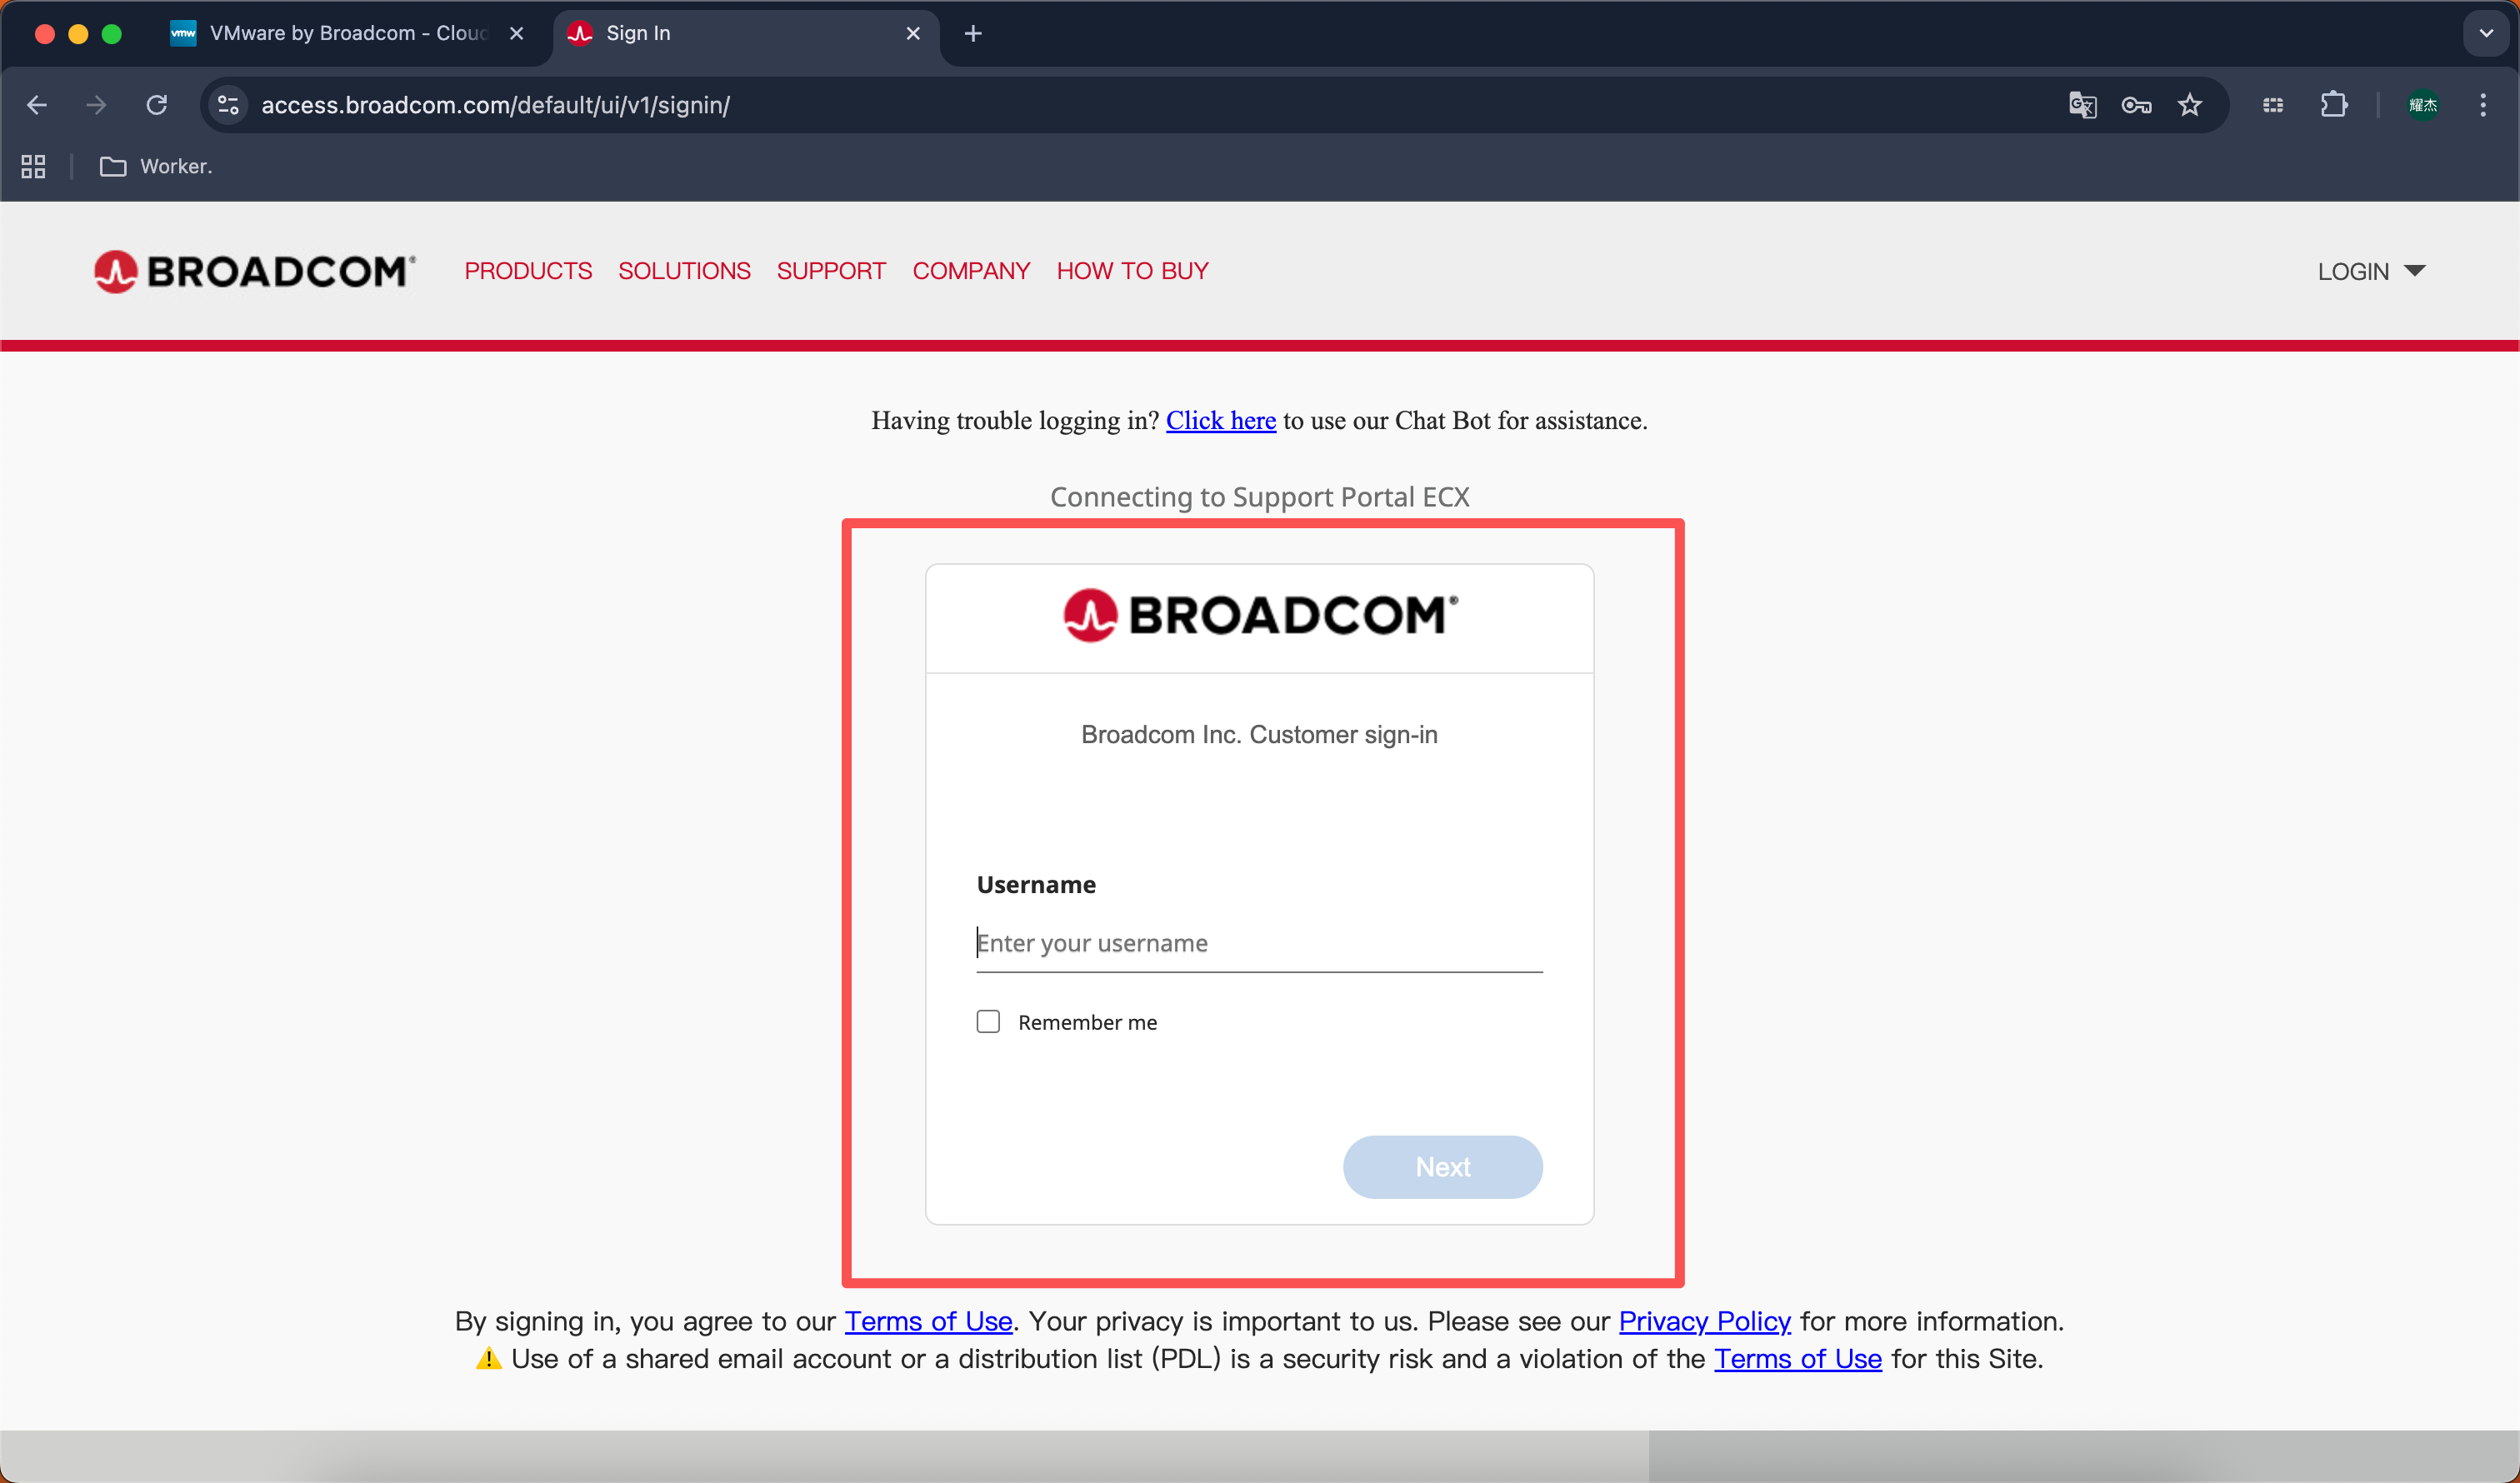
It will prompt to log in, register and log in according to your needs
After logging in, click “My Downloads” on the left -> Click “HERE”
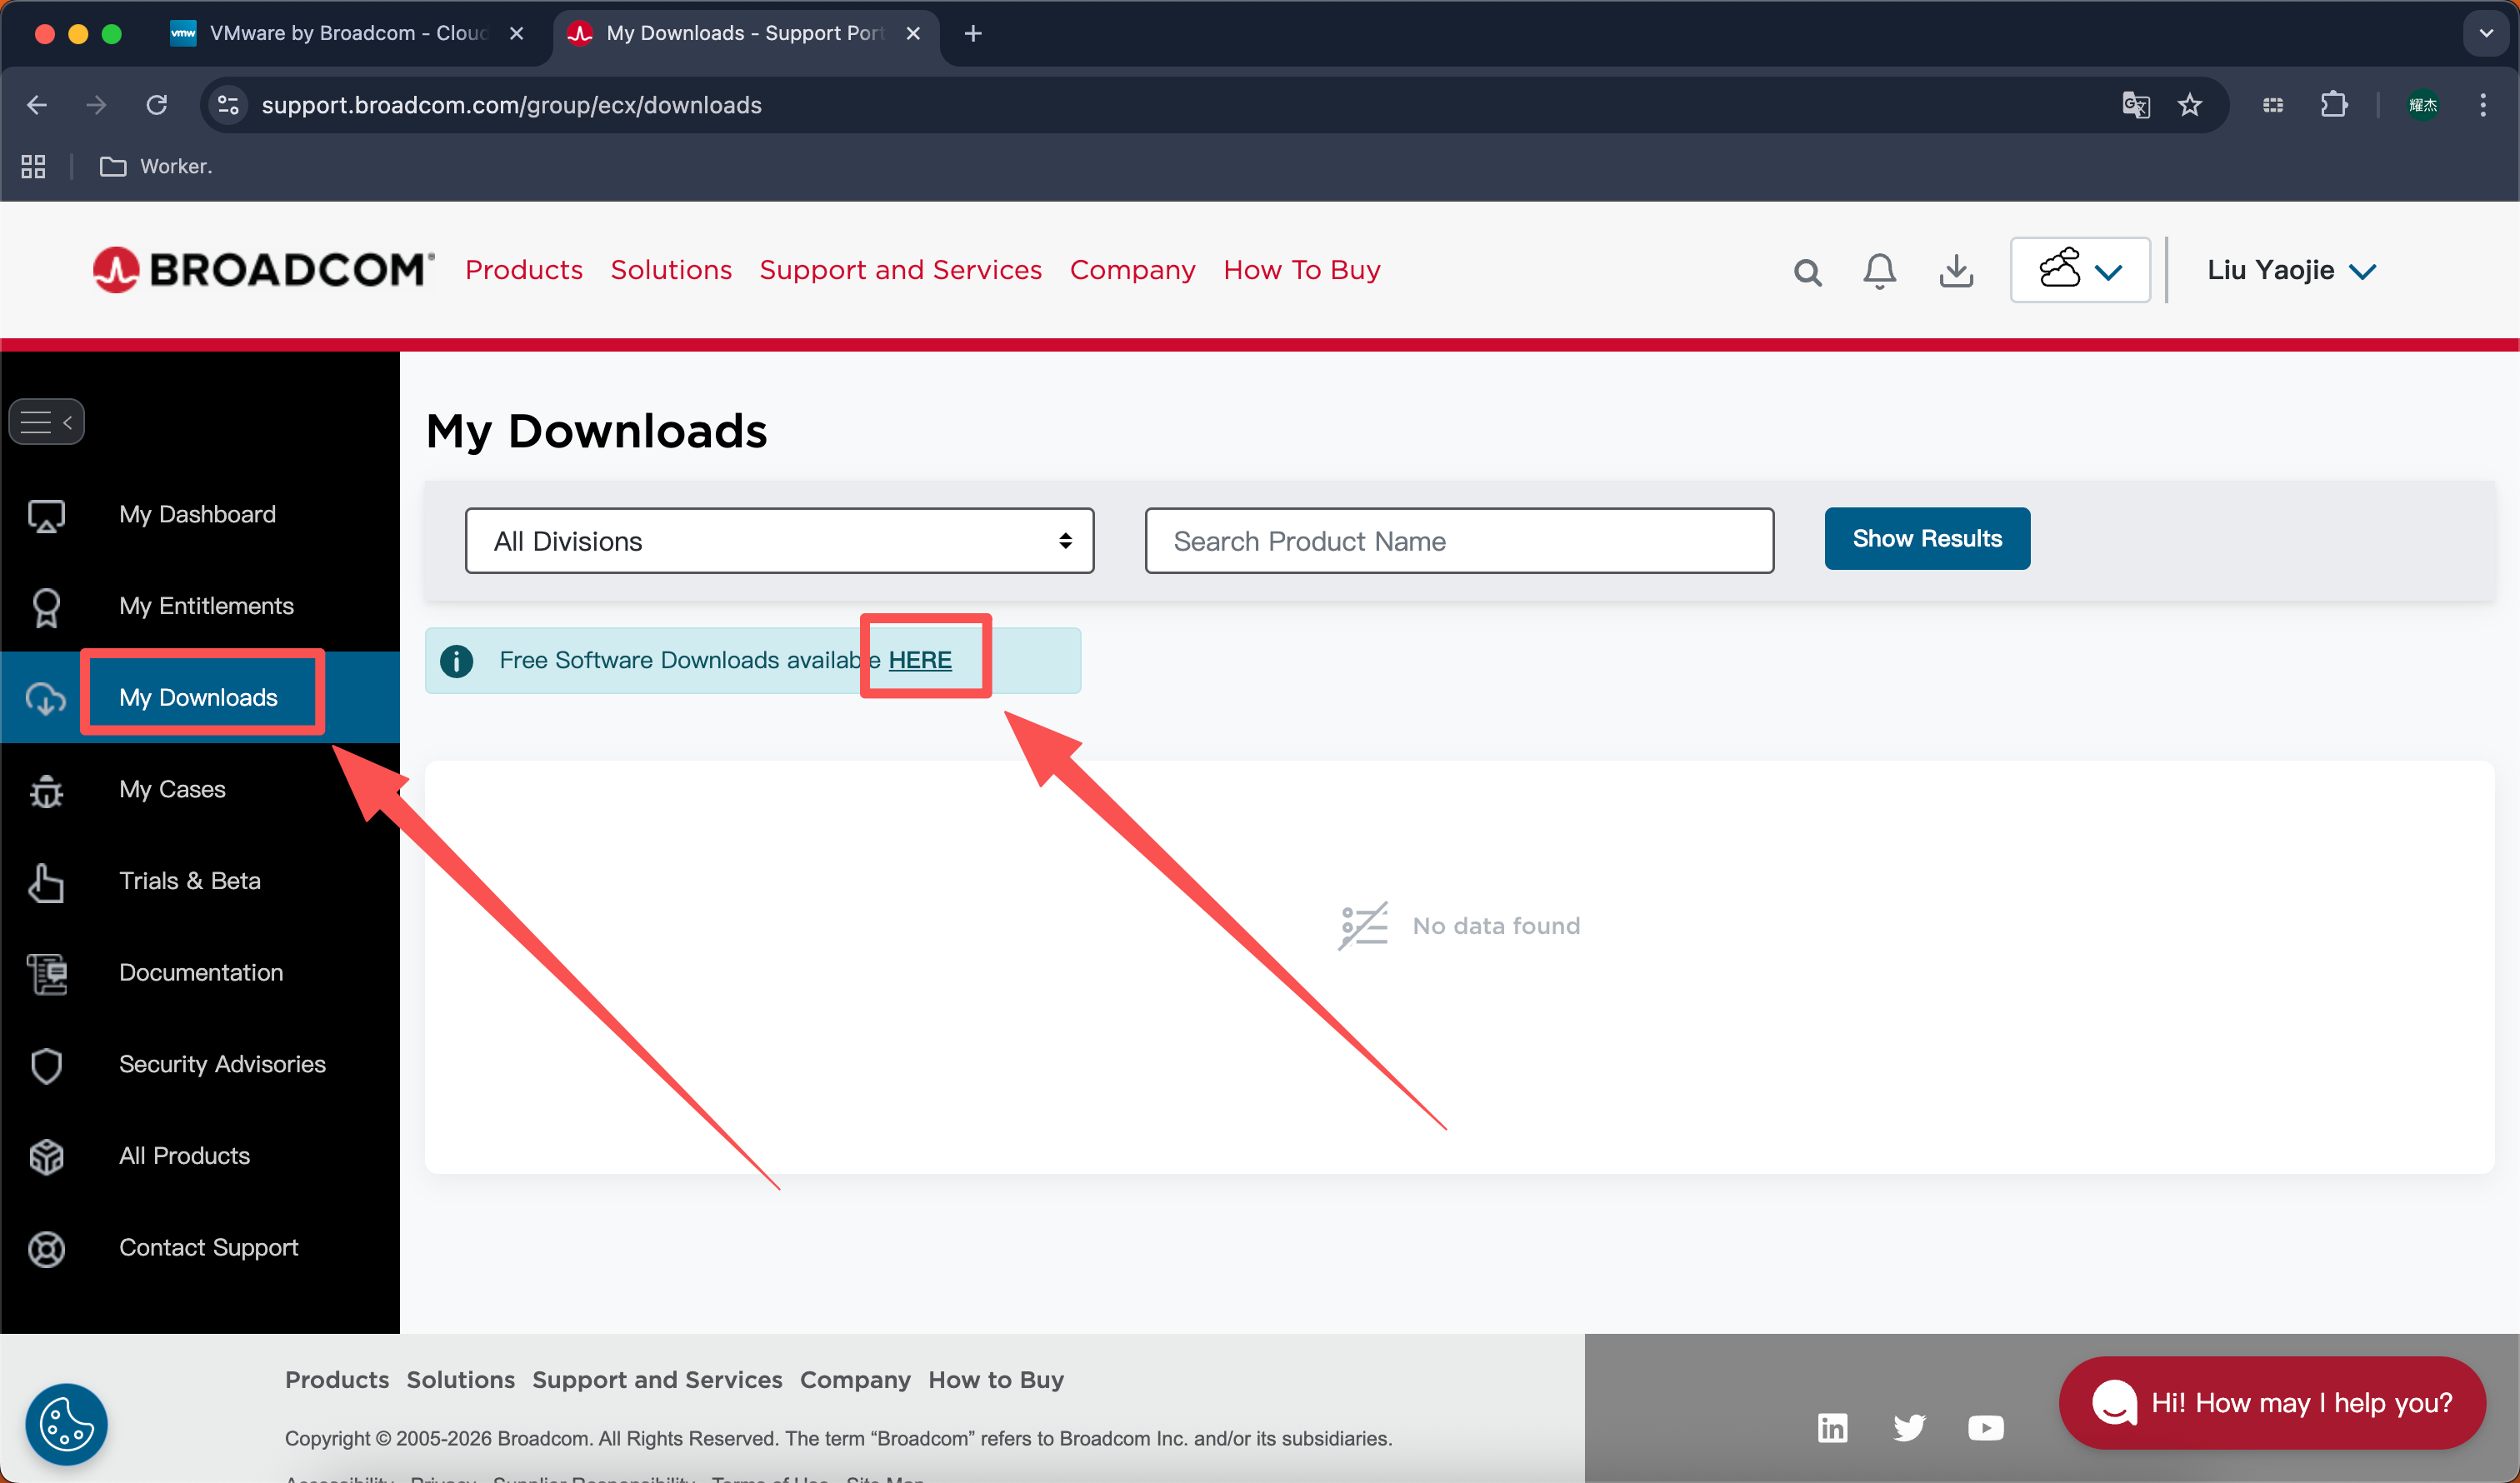
Select “VMware Workstation Pro”
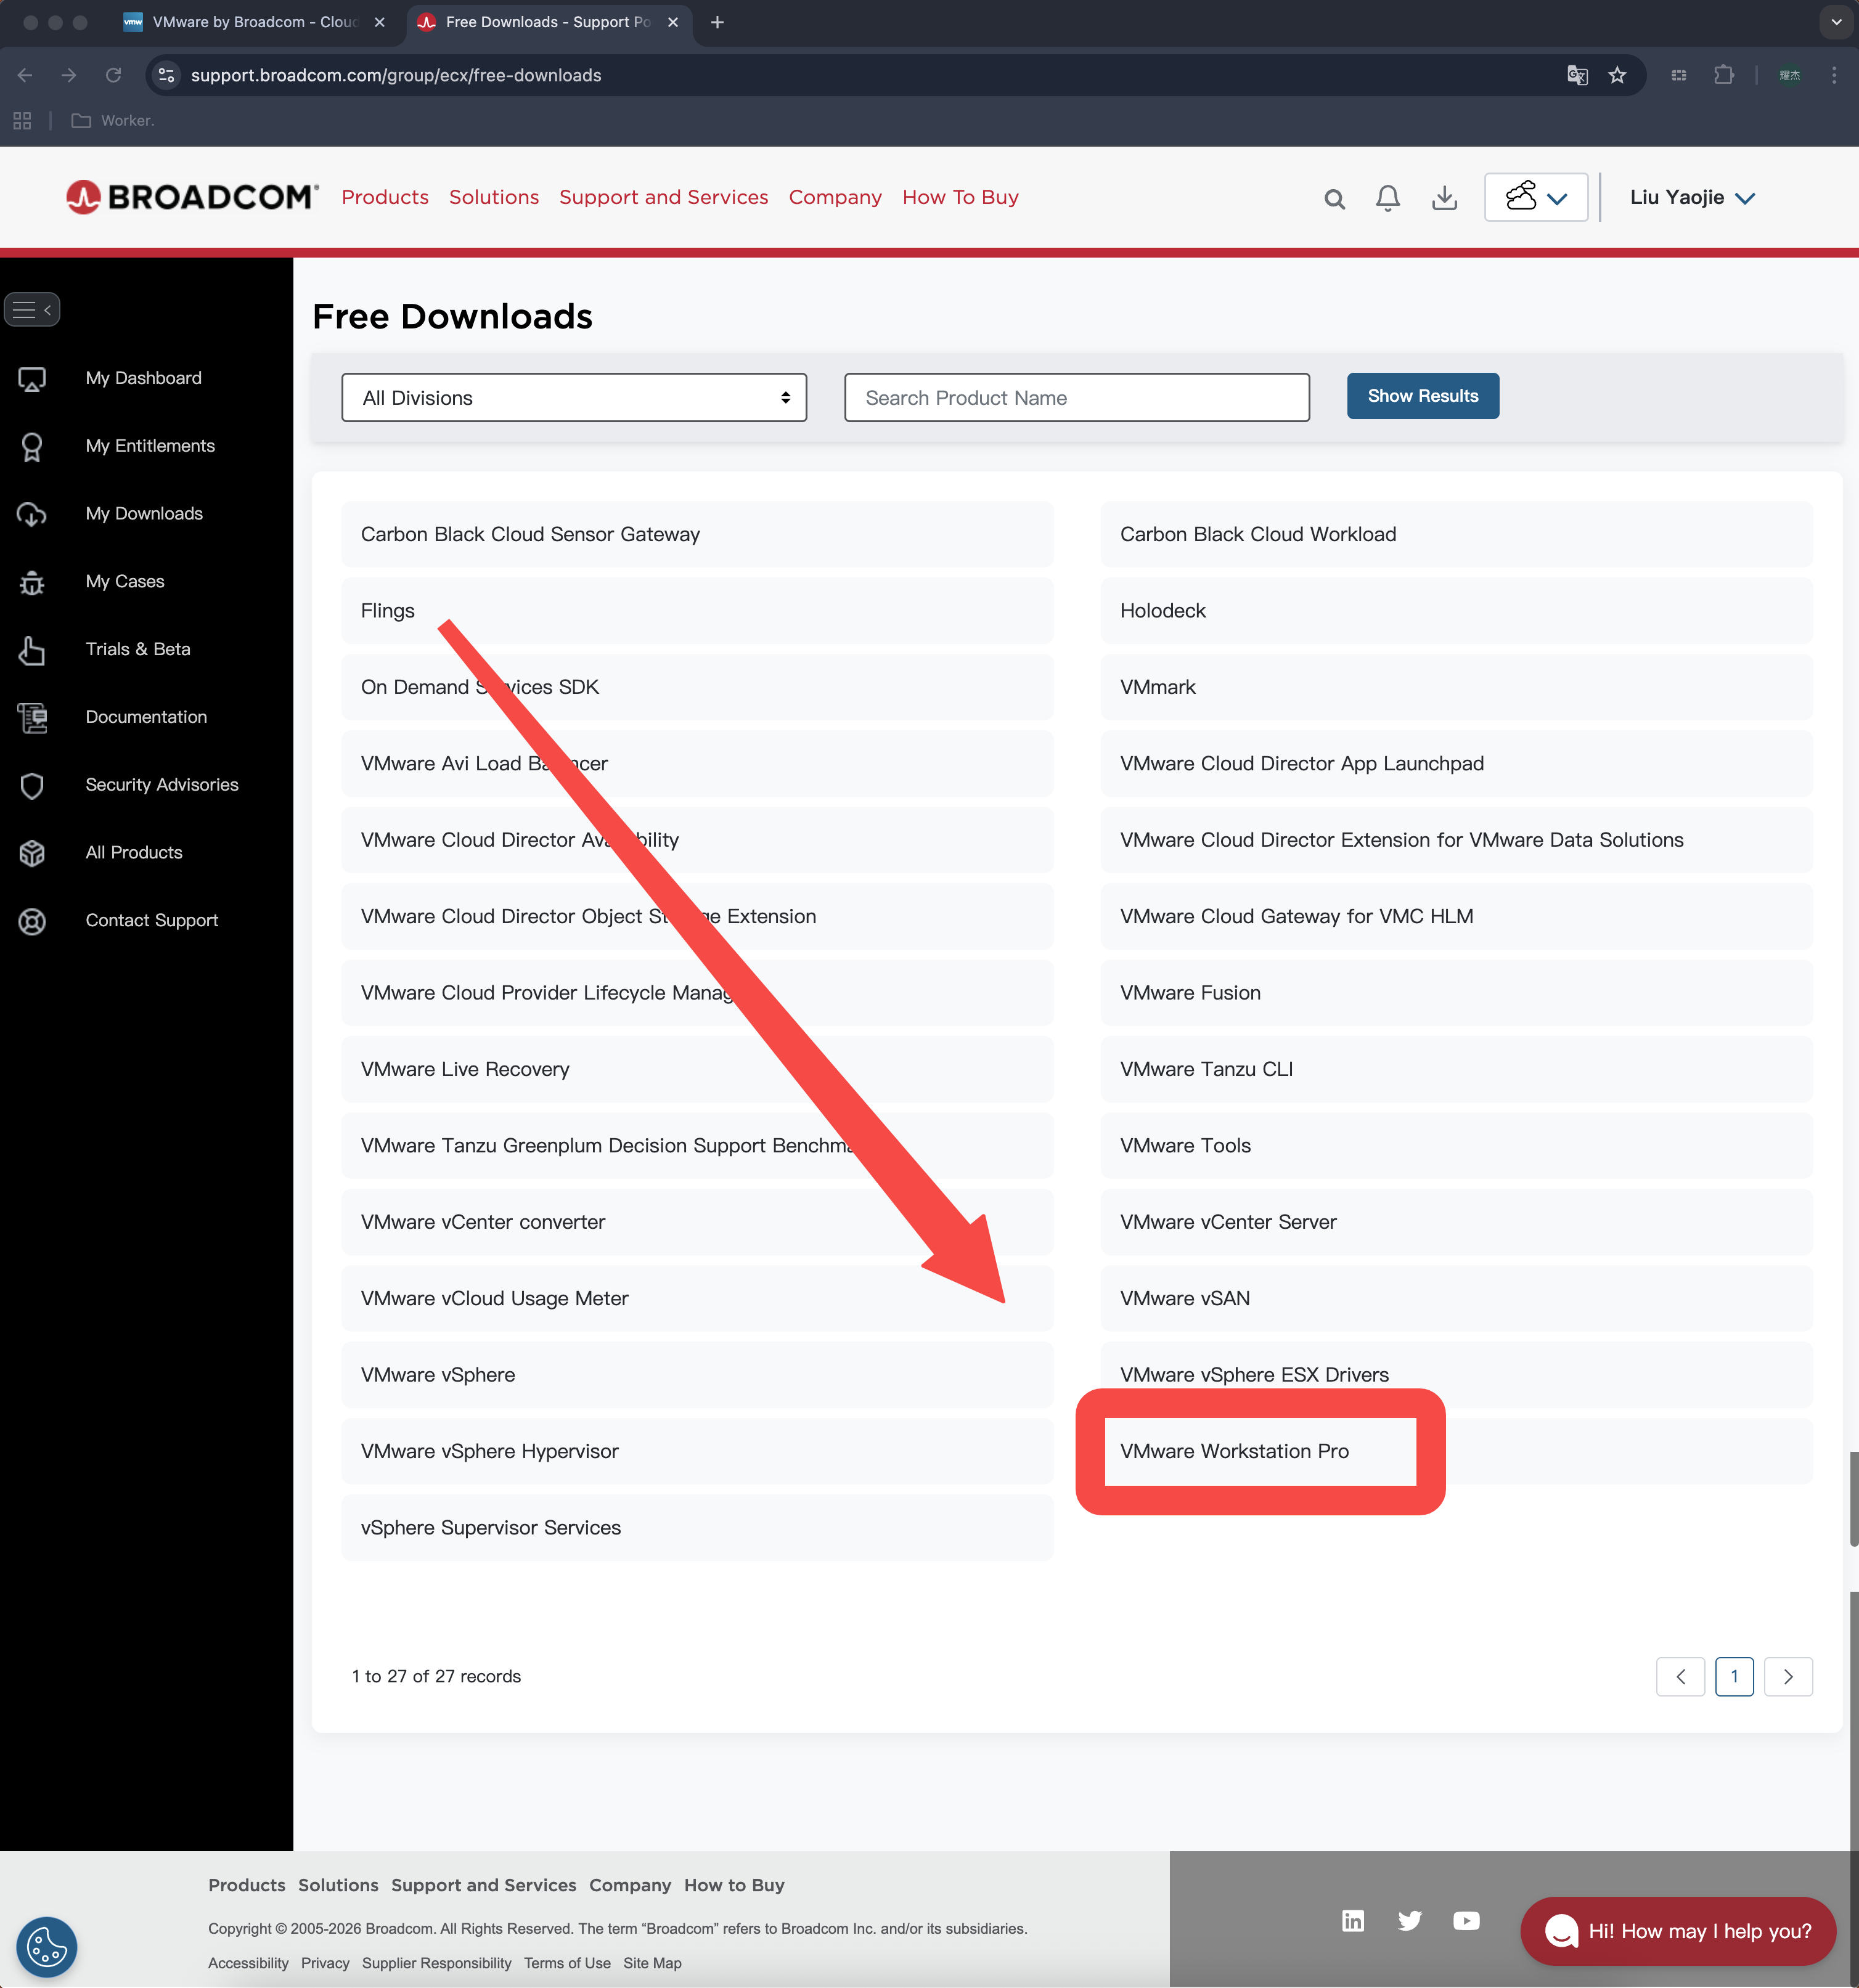
Find your “System Version” and click, I here chose VMware Workstation Pro 17.0 for Windows
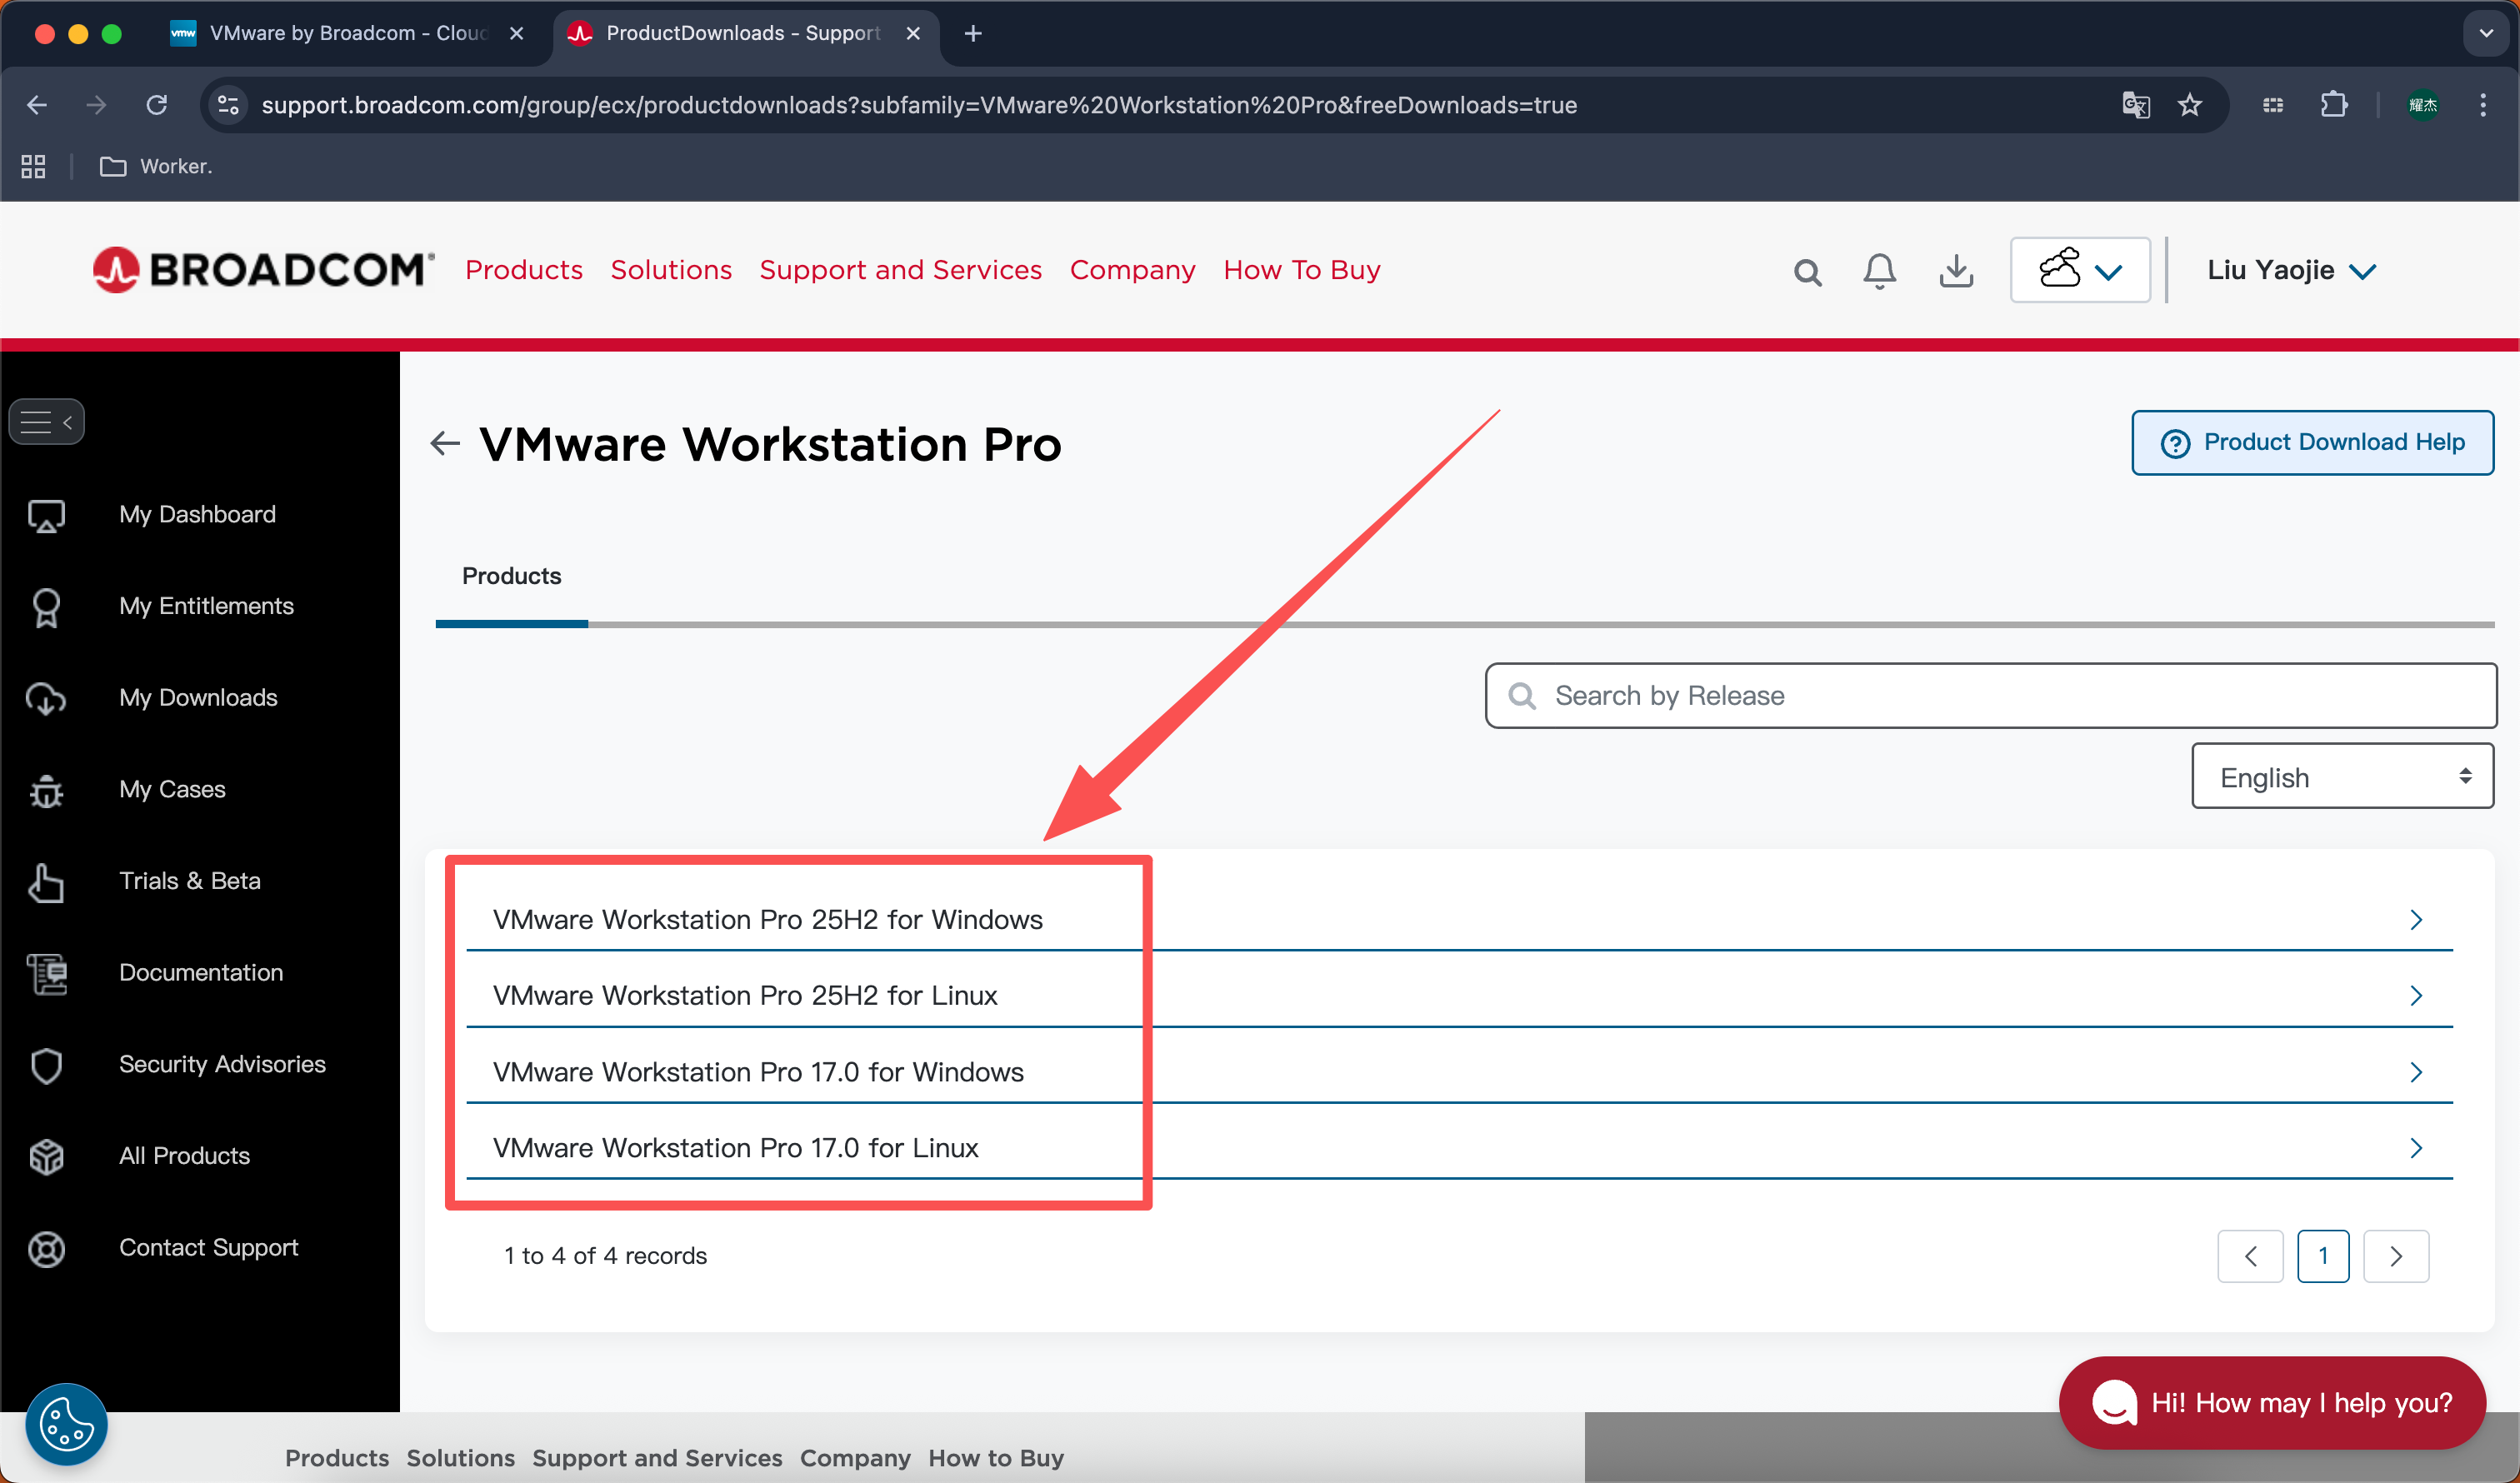
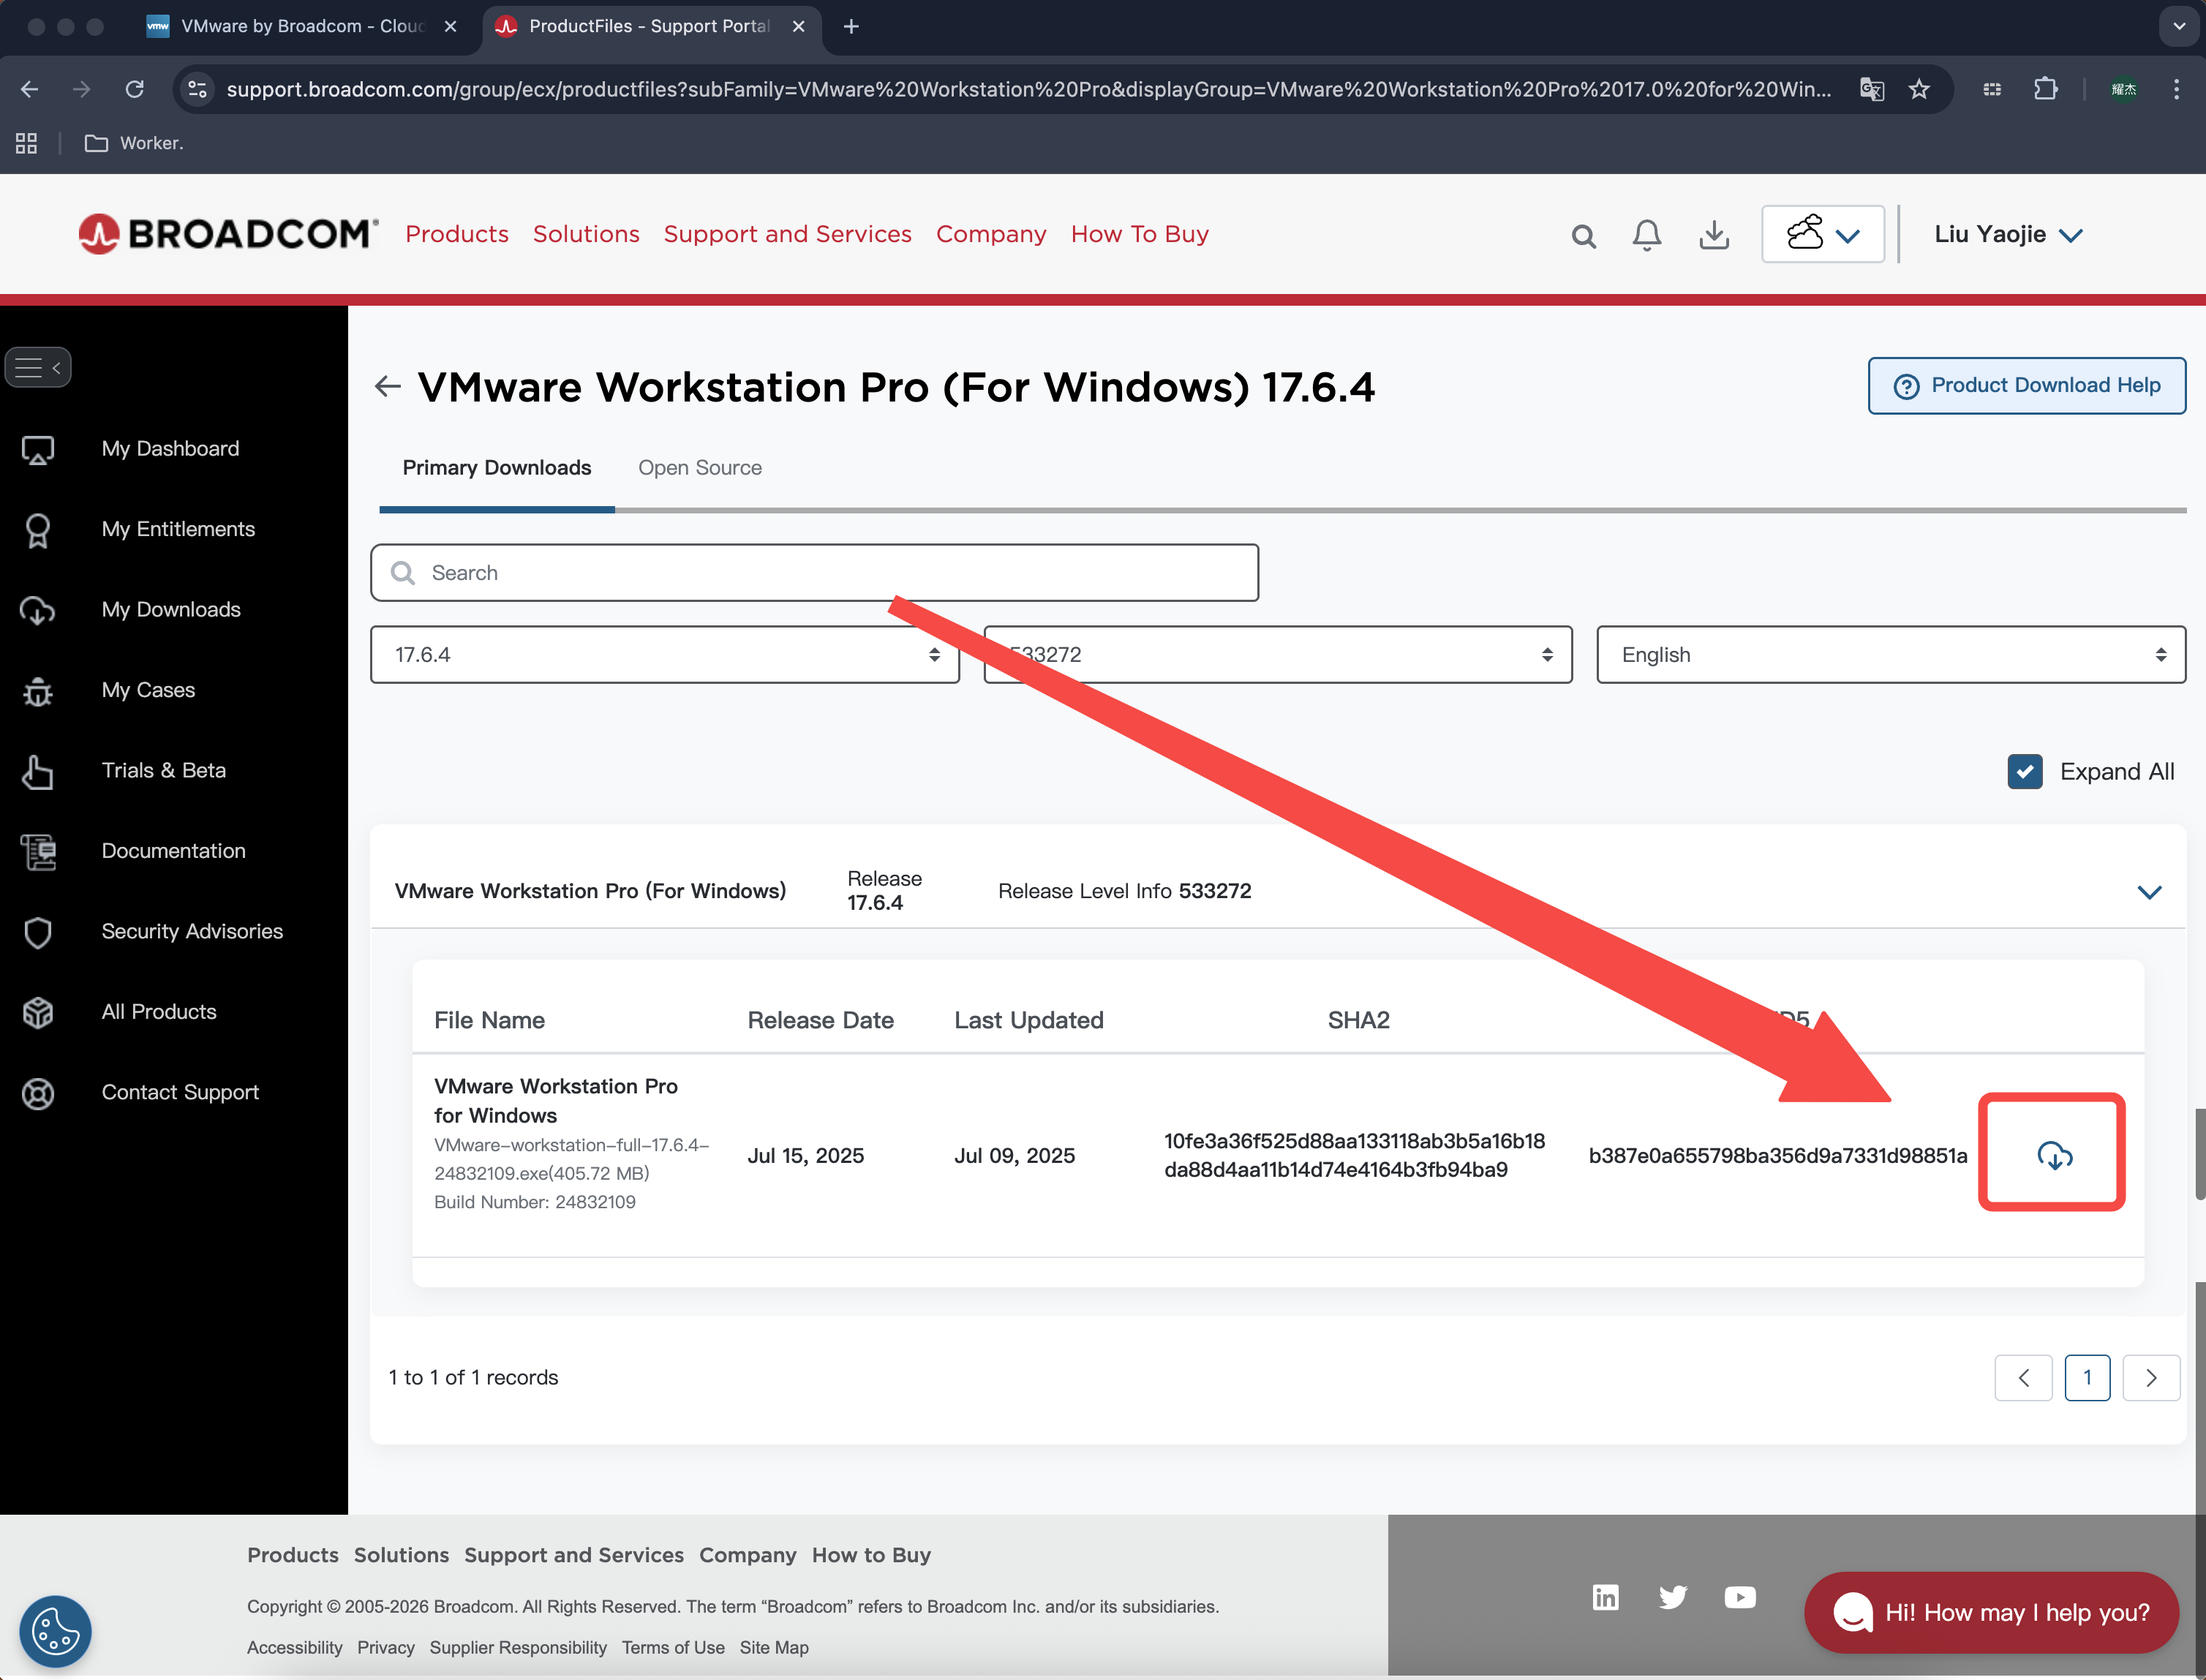
Select this latest version “17.6.4” and open

Click the “Small Cloud” on the right to download
Installing VMware
Step 1:
Open the VMware installer
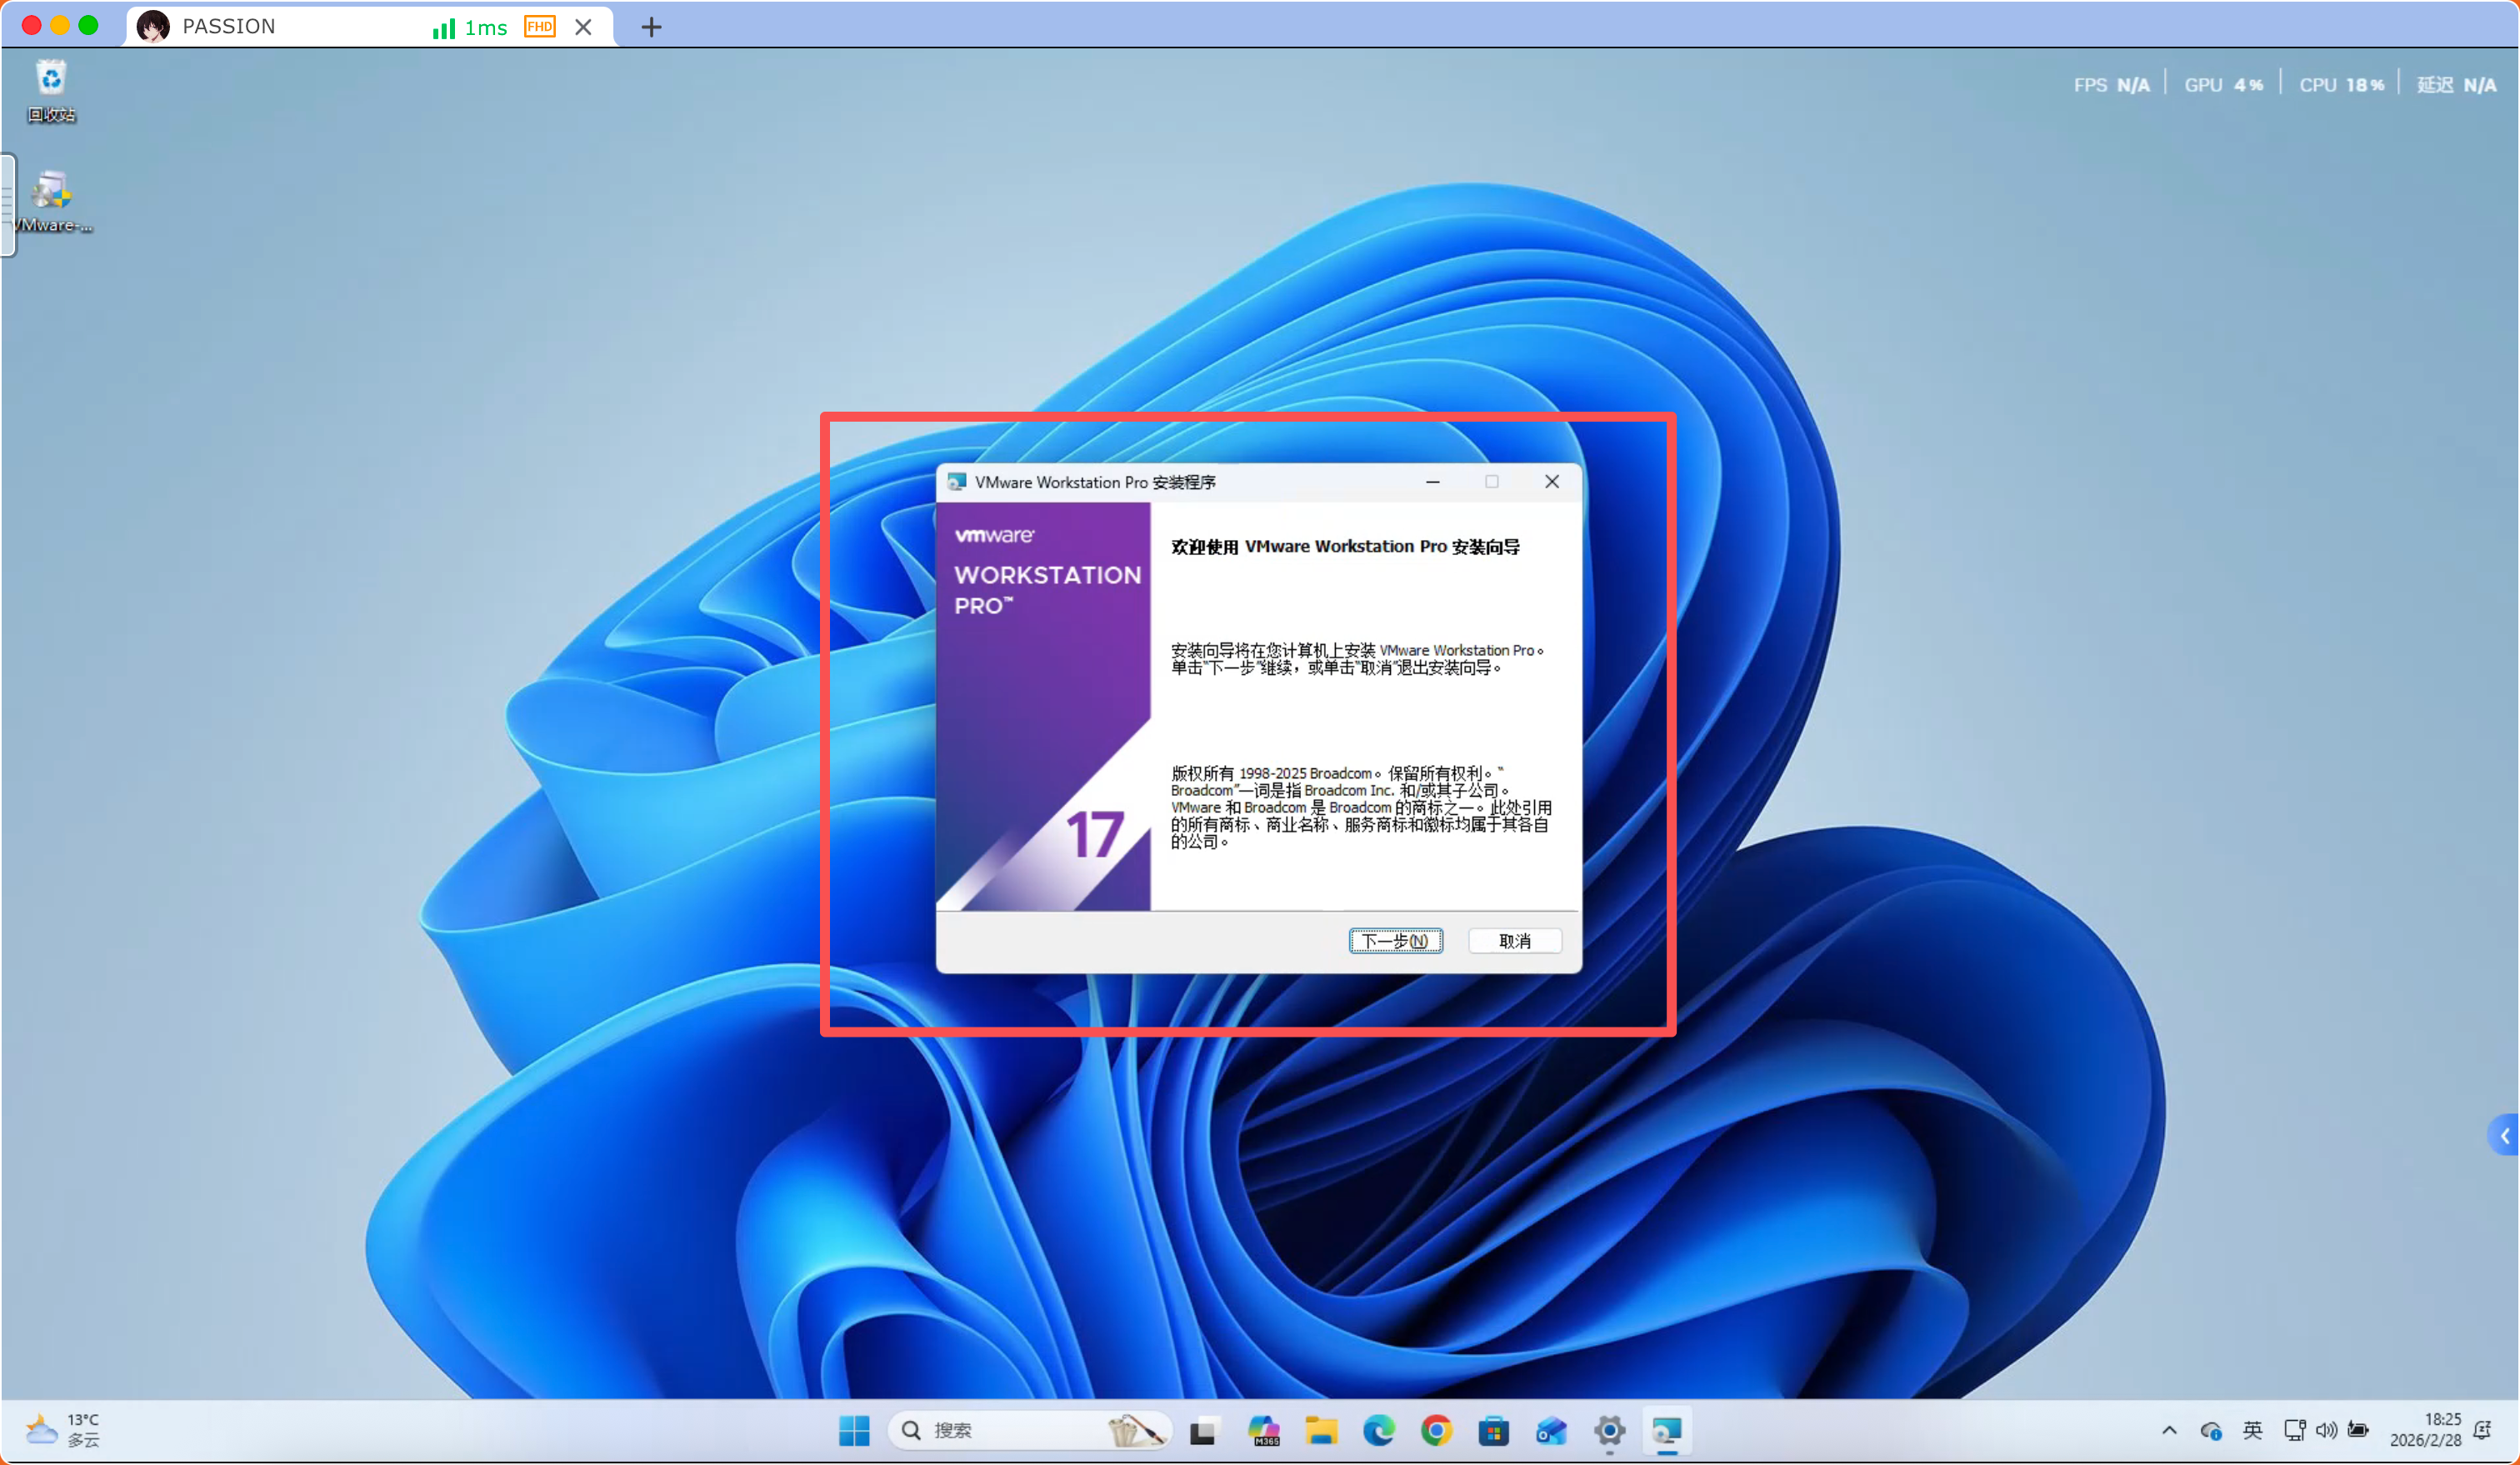
Step 2:
The following pop-up window will appear, click “Next”
Step 3:
“Accept the license agreement terms” and click “Next”

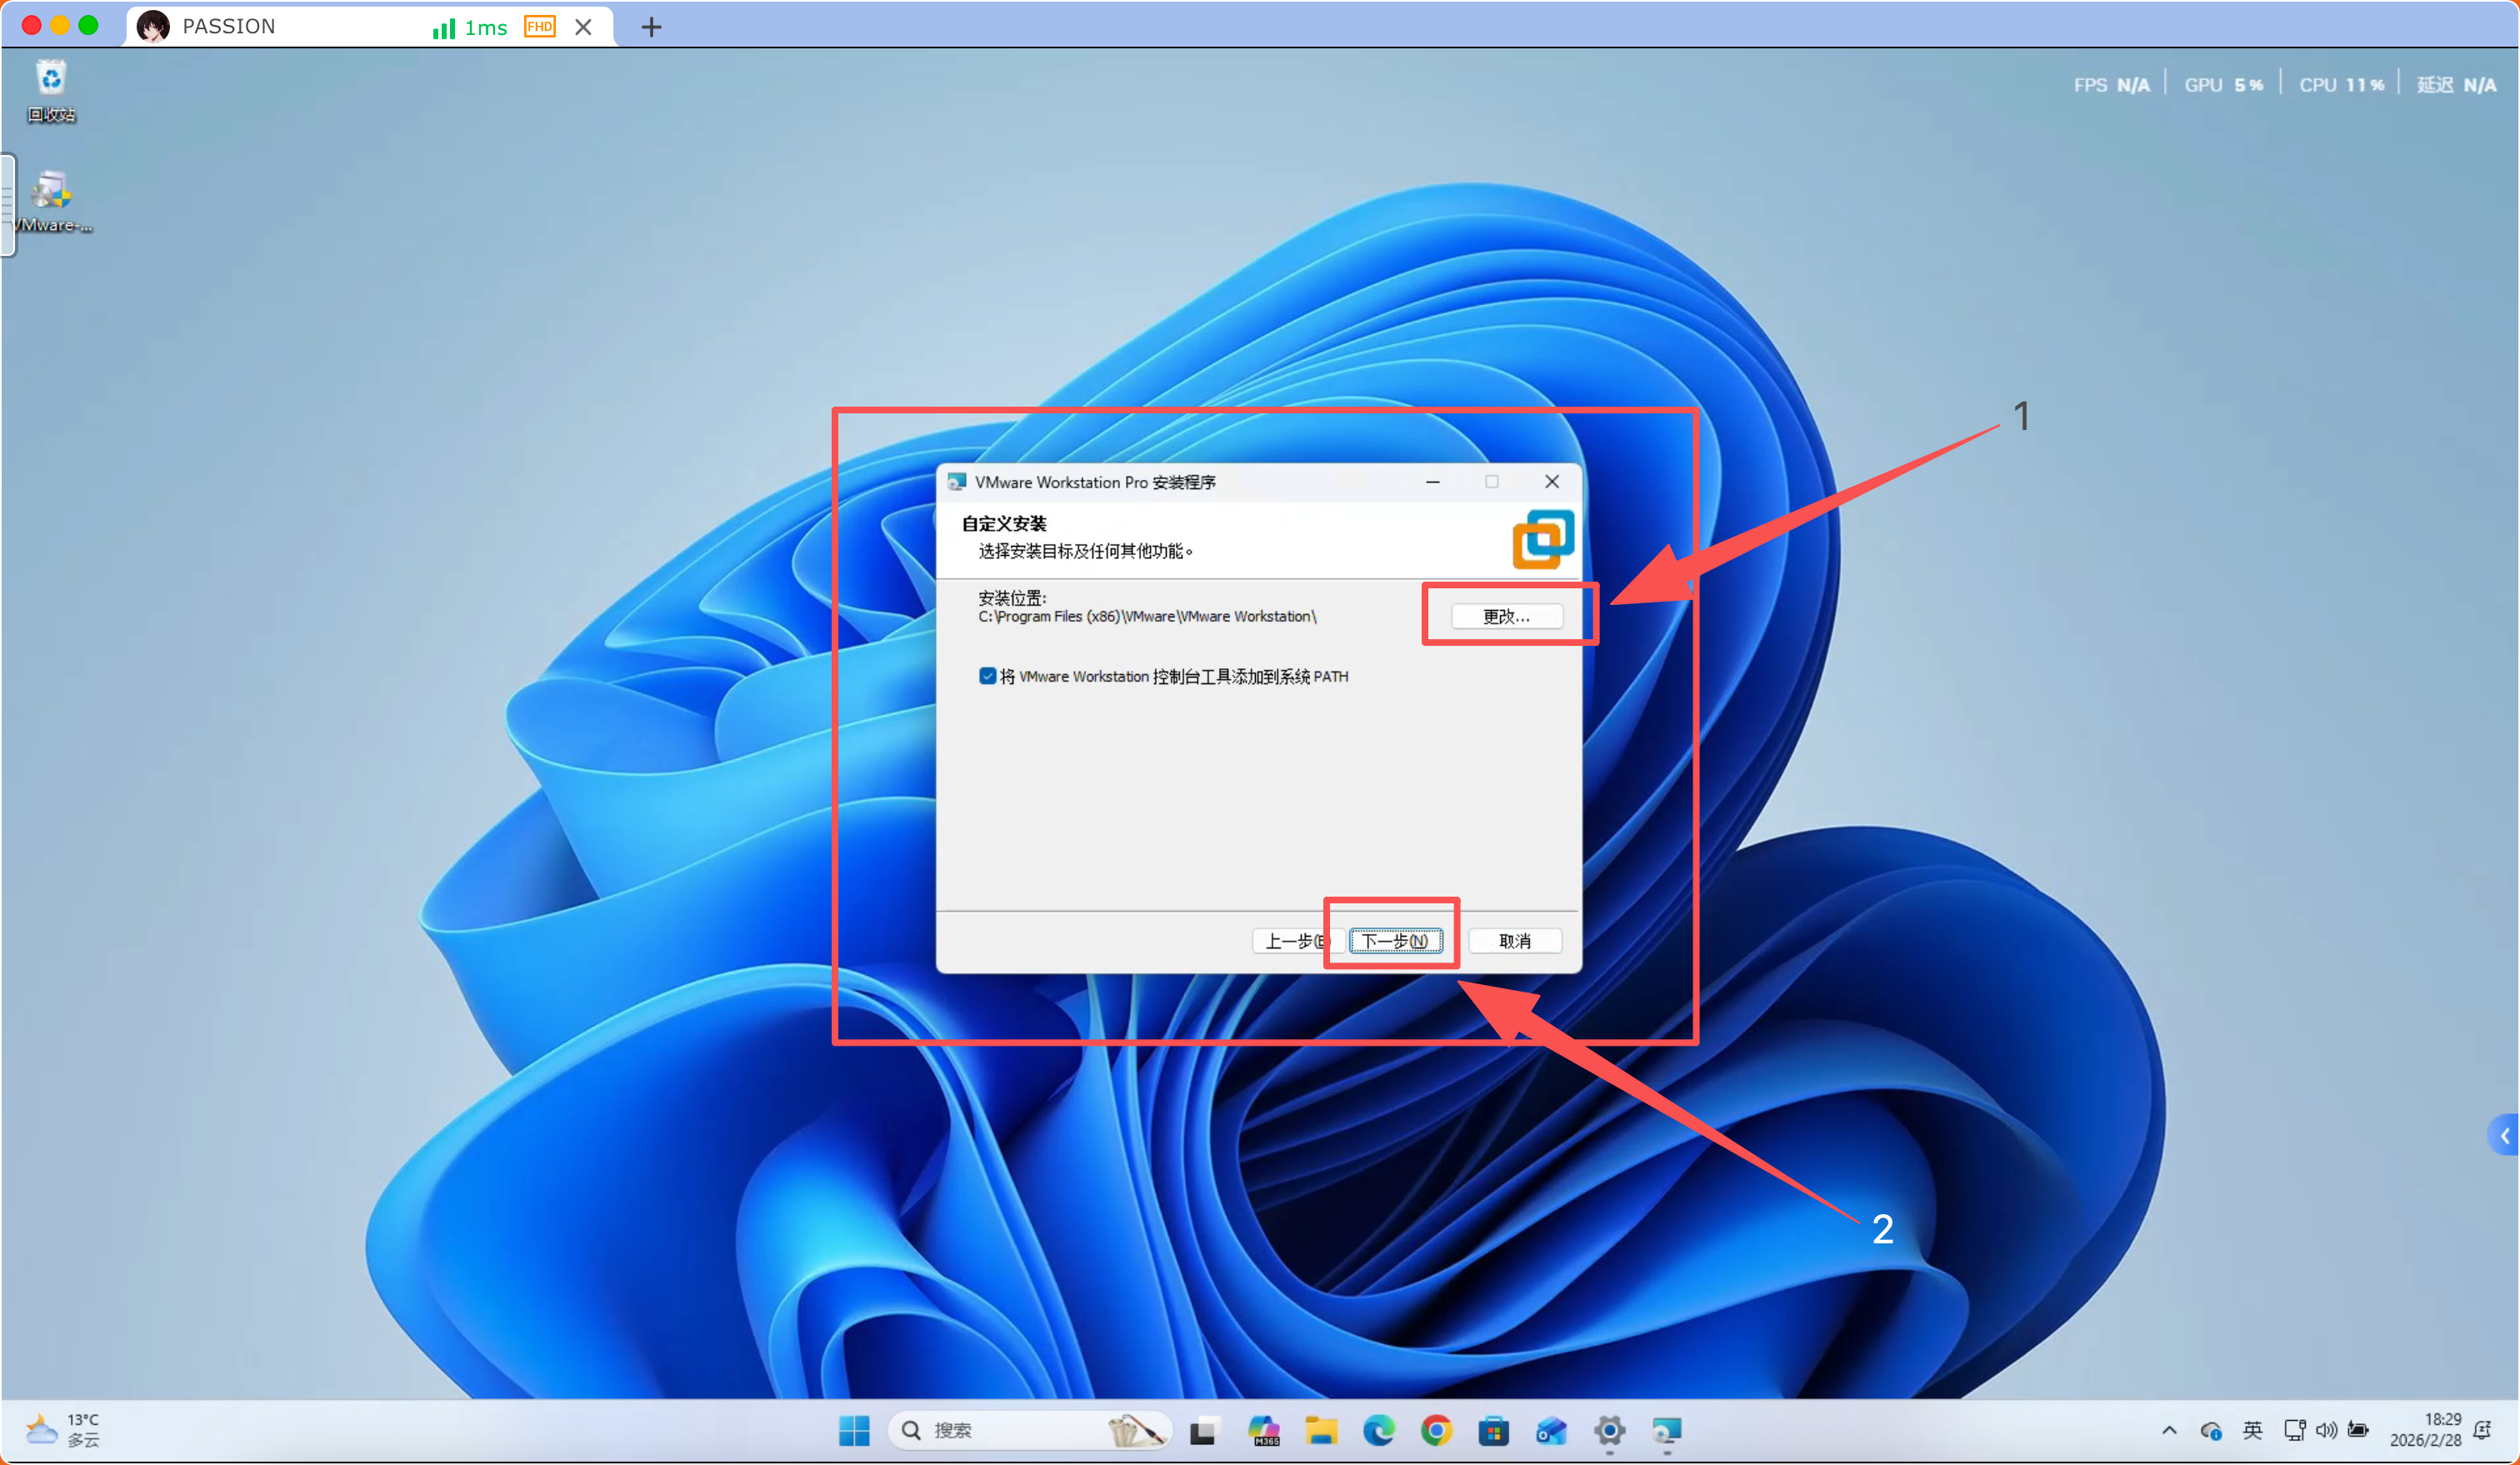
Step 4:
Select “Installation Location” and click “Next”
Step 5:
Click “OK” on the warning message prompt

Step 6:
Click “Next” for User Experience

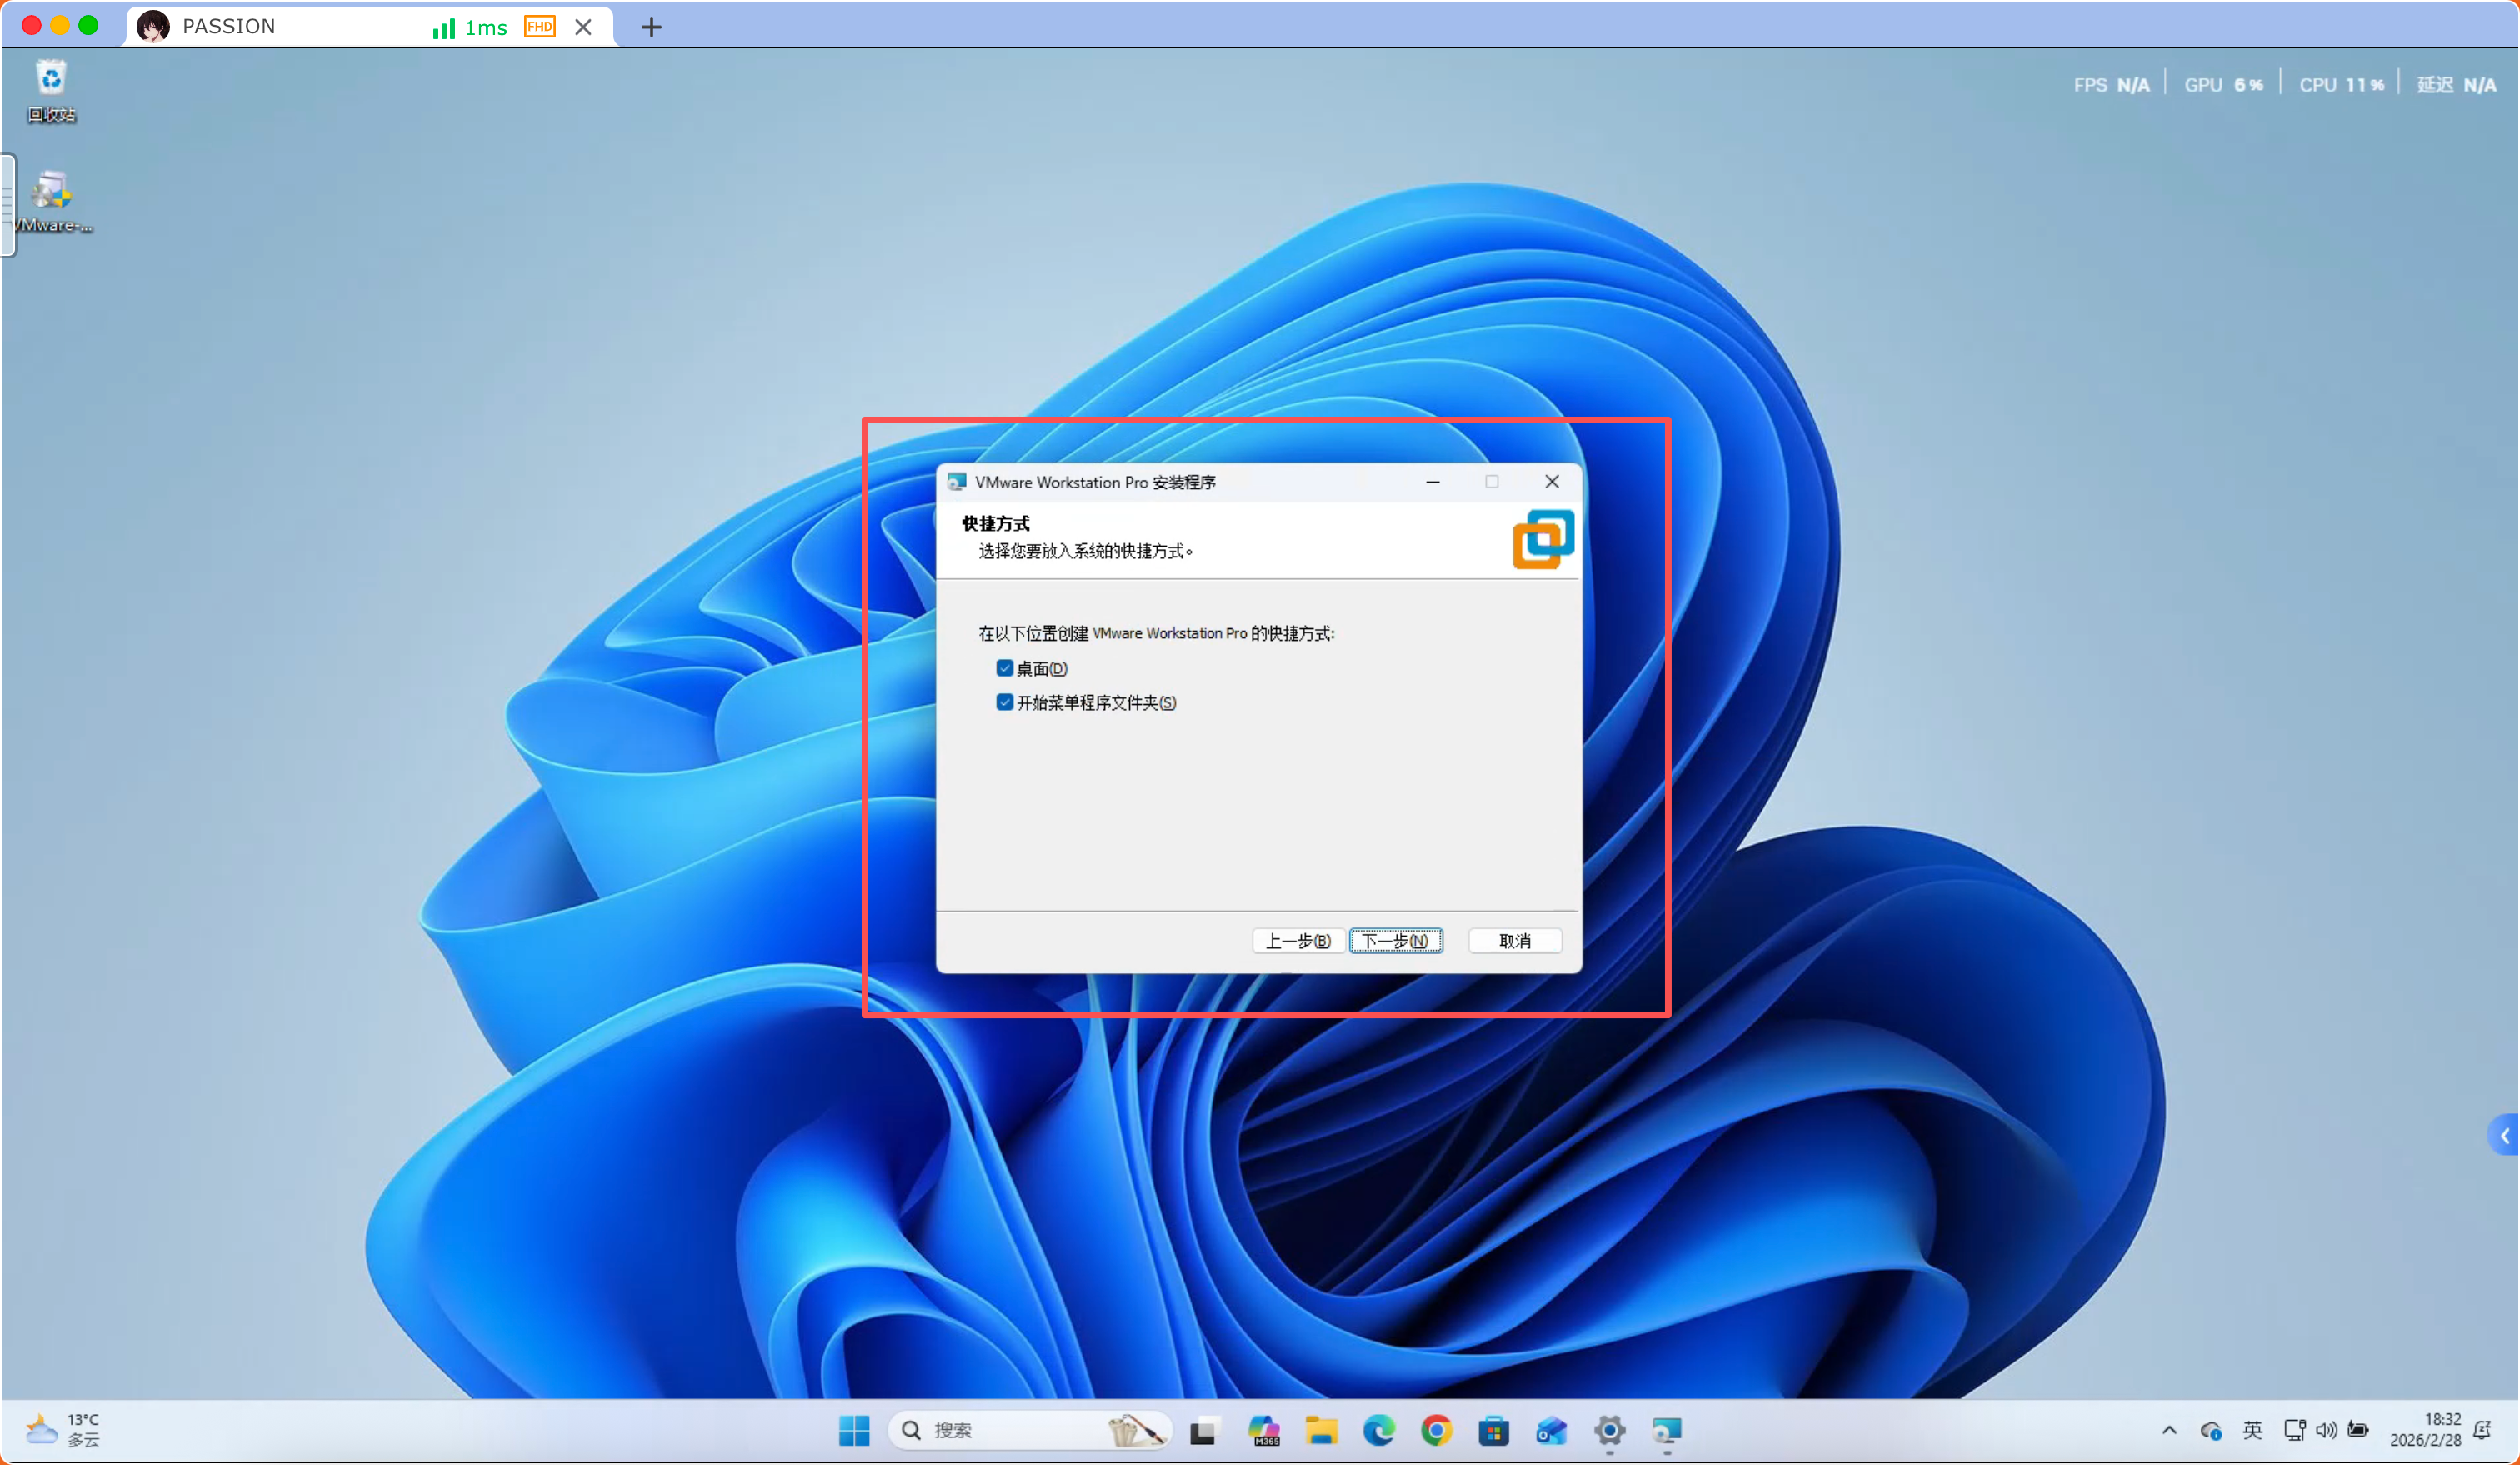
Step 7:
Click “Next” for Create Shortcuts
Step 8:
Final step, click “Install”, wait for installation to complete

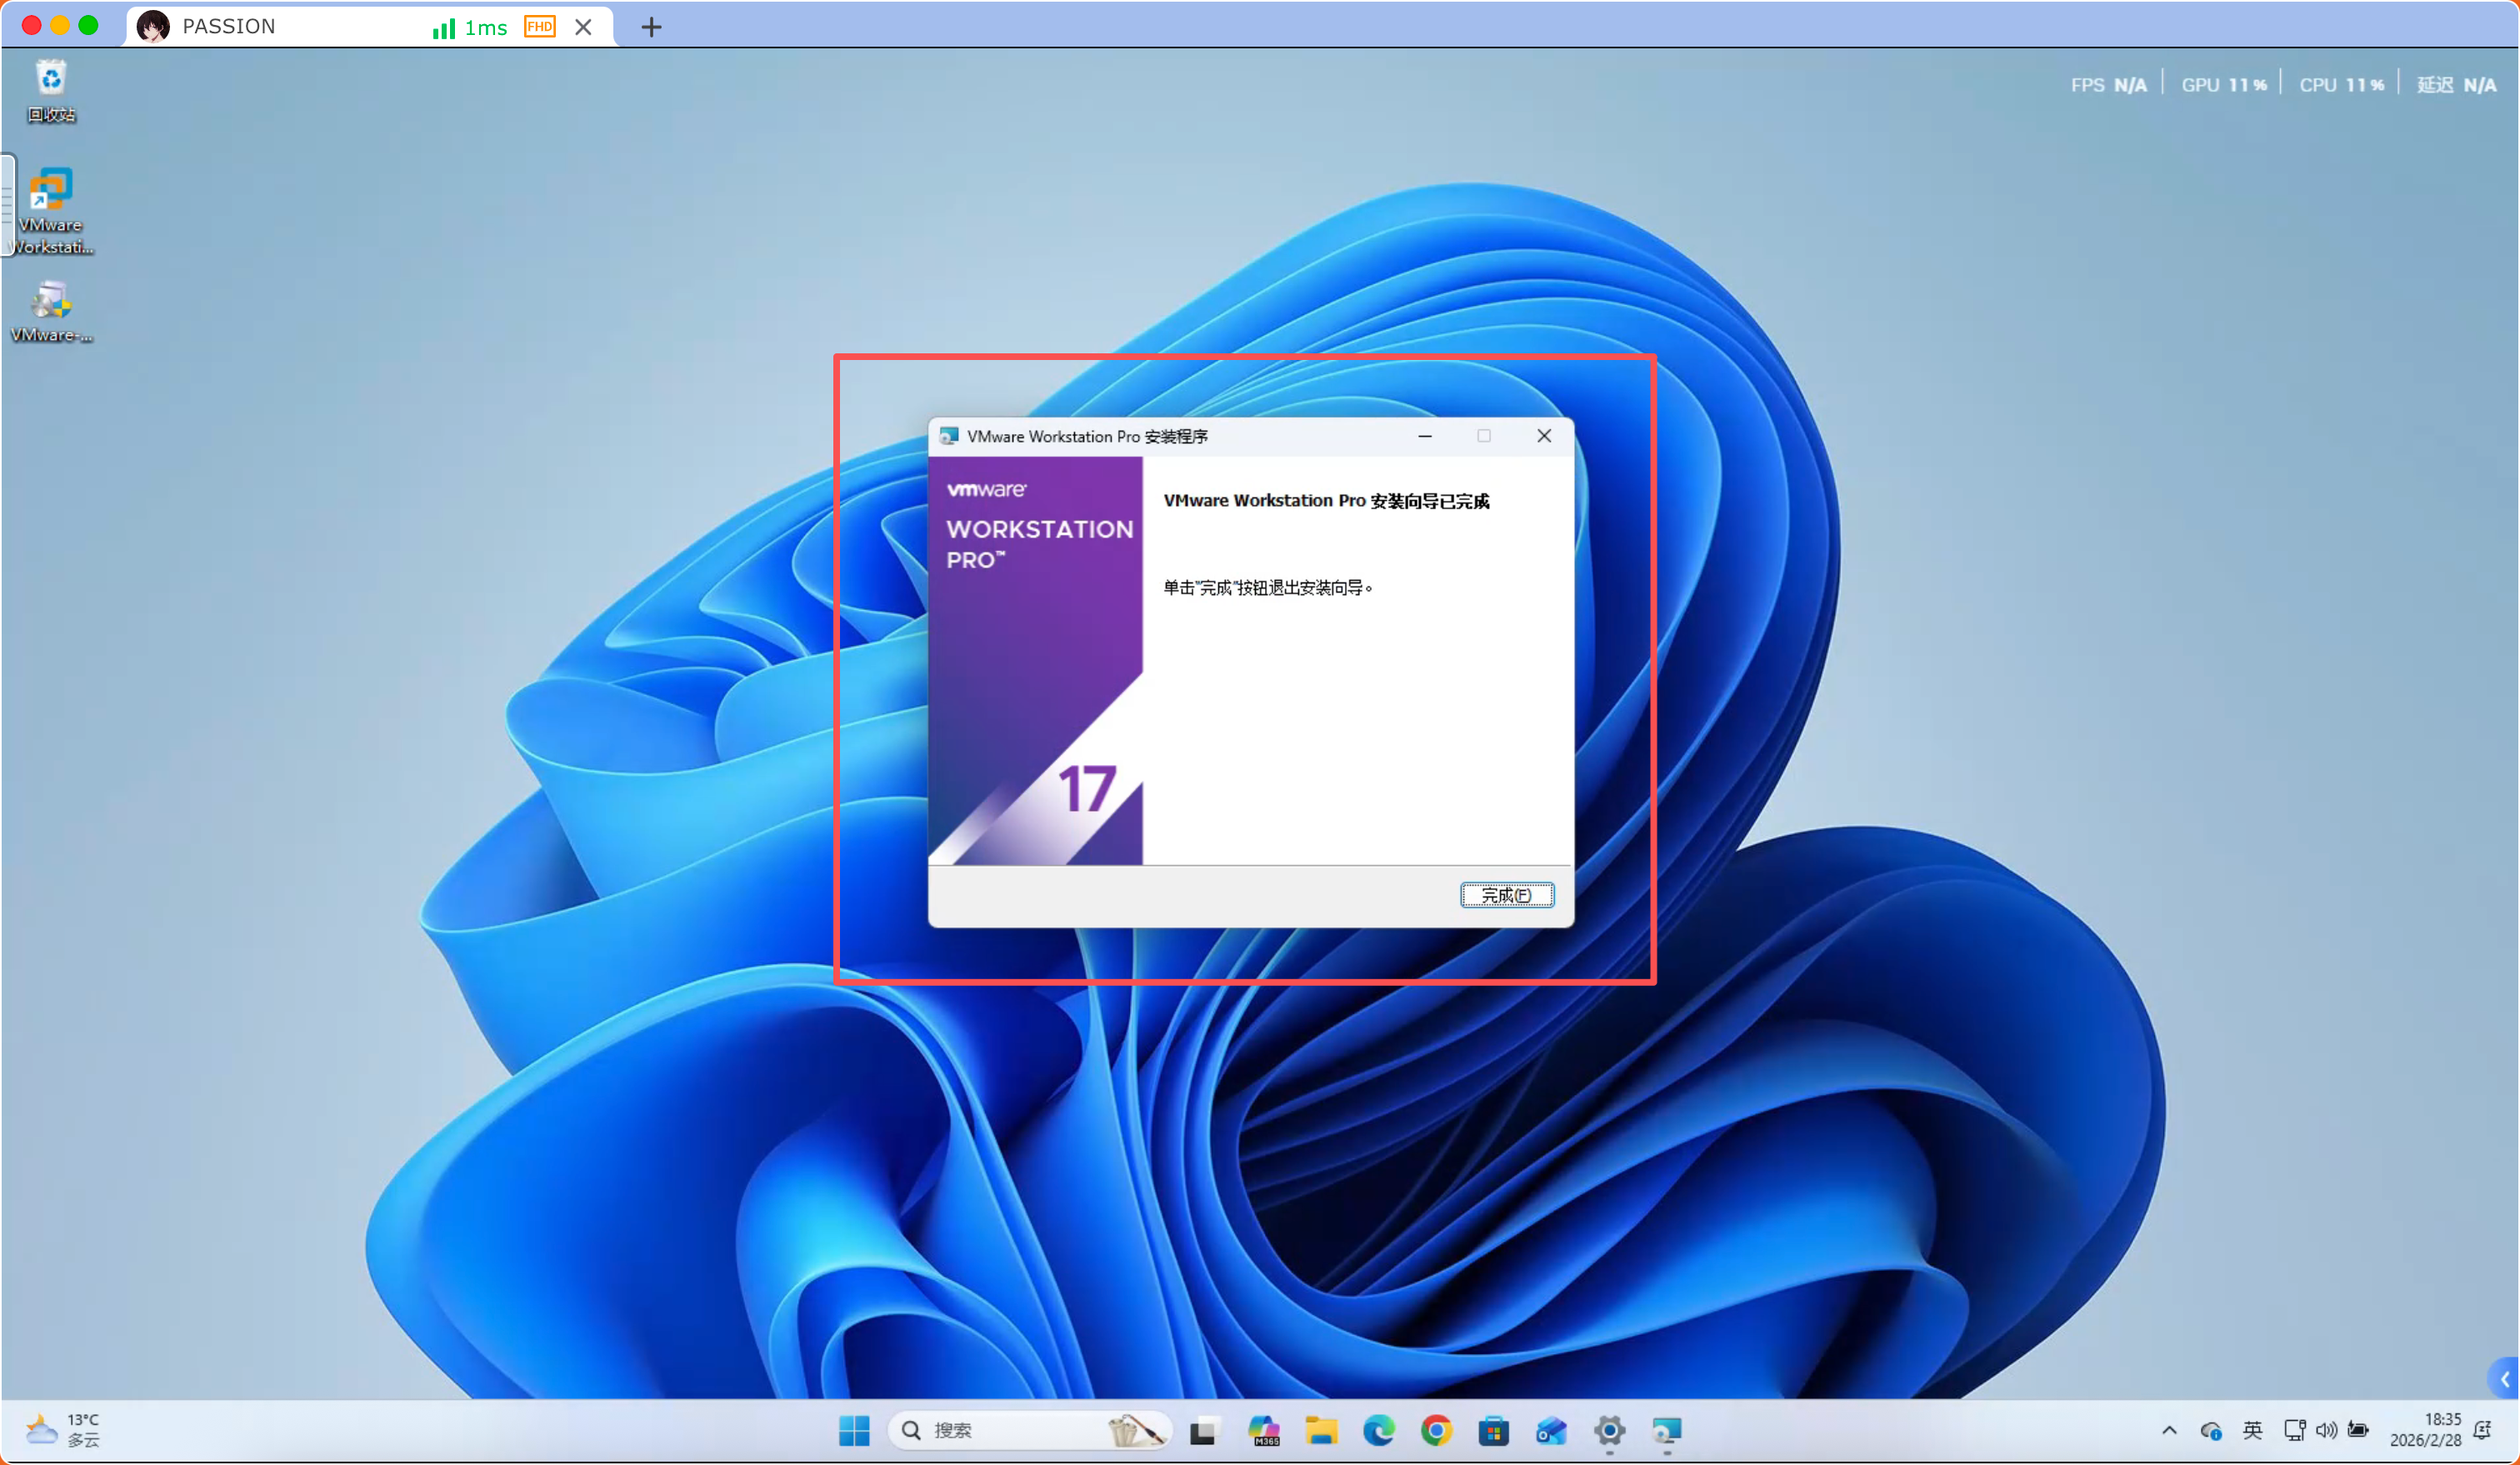
Step 9:
Click “Finish”, installation complete